Since the release of version 3.7.12, FIGPEA has included a powerful font management feature that allows users to install and manage fonts for rendering purposes.
This feature has greatly expanded the capabilities of FIGPEA, and has provided a seamless and efficient solution for users who require specific fonts for their projects.
Access font manager
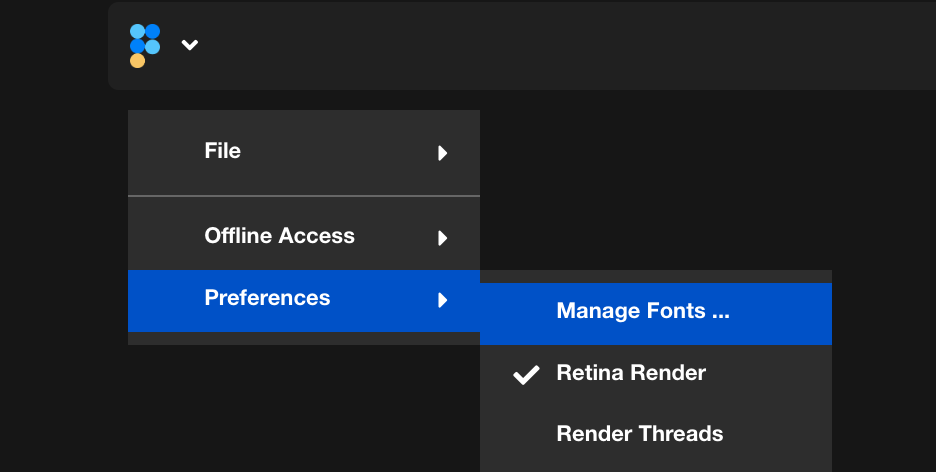
To access the font manager, navigate to the Menu -> Preferences -> Font Manager item. Once opened, the font manager provides users with two ways to install fonts: locally or from the FIGPEA server.

Install fonts from local
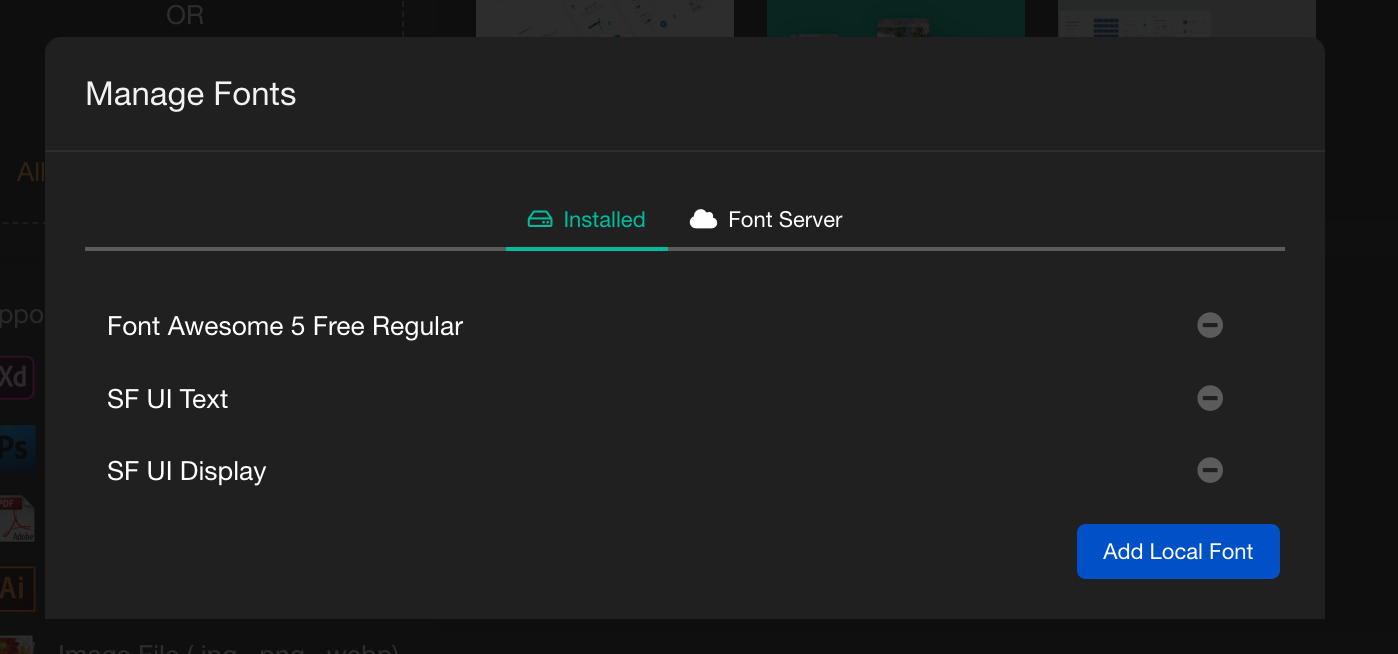
To add a font file locally, simply click on the Add Local Font button and select the font file. The font file must be in a supported format, such as TTF (True Type Font), OTF (OpenType Font), WOFF (Web Open Font Format), or WOFF2.

It is important to note that the supported format may vary depending on the browser being used. Once the font file has been added, a dialog box will appear requesting the font name. It is also important to note that the font name is not case sensitive and should match the name of the font used by layers in FIGPEA. Once the font has been installed, it can be immediately used in renderings, though it is recommended to close and reopen the project.
Removing a font is also a simple process. To remove an installed font, simply click on the minus button next to the font.
Install fonts from server
FIGPEA also provides users with the option to install fonts from the FIGPEA server. This can be done by accessing the remote fonts available for download. Users can find all remote fonts and download them locally if needed.

The font management feature in FIGPEA has been instrumental in enhancing the user experience and has greatly expanded the possibilities for creative professionals. With the ability to add and manage fonts seamlessly, users can create more complex and visually appealing projects with ease.