 Figpea
Advanced Layer Operations
This guide covers advanced layer operations and tools in Figpea that help you work more efficiently with complex designs. These features build upon the basic operations to provide more precise control and professional capabilities.
Inspect Tool

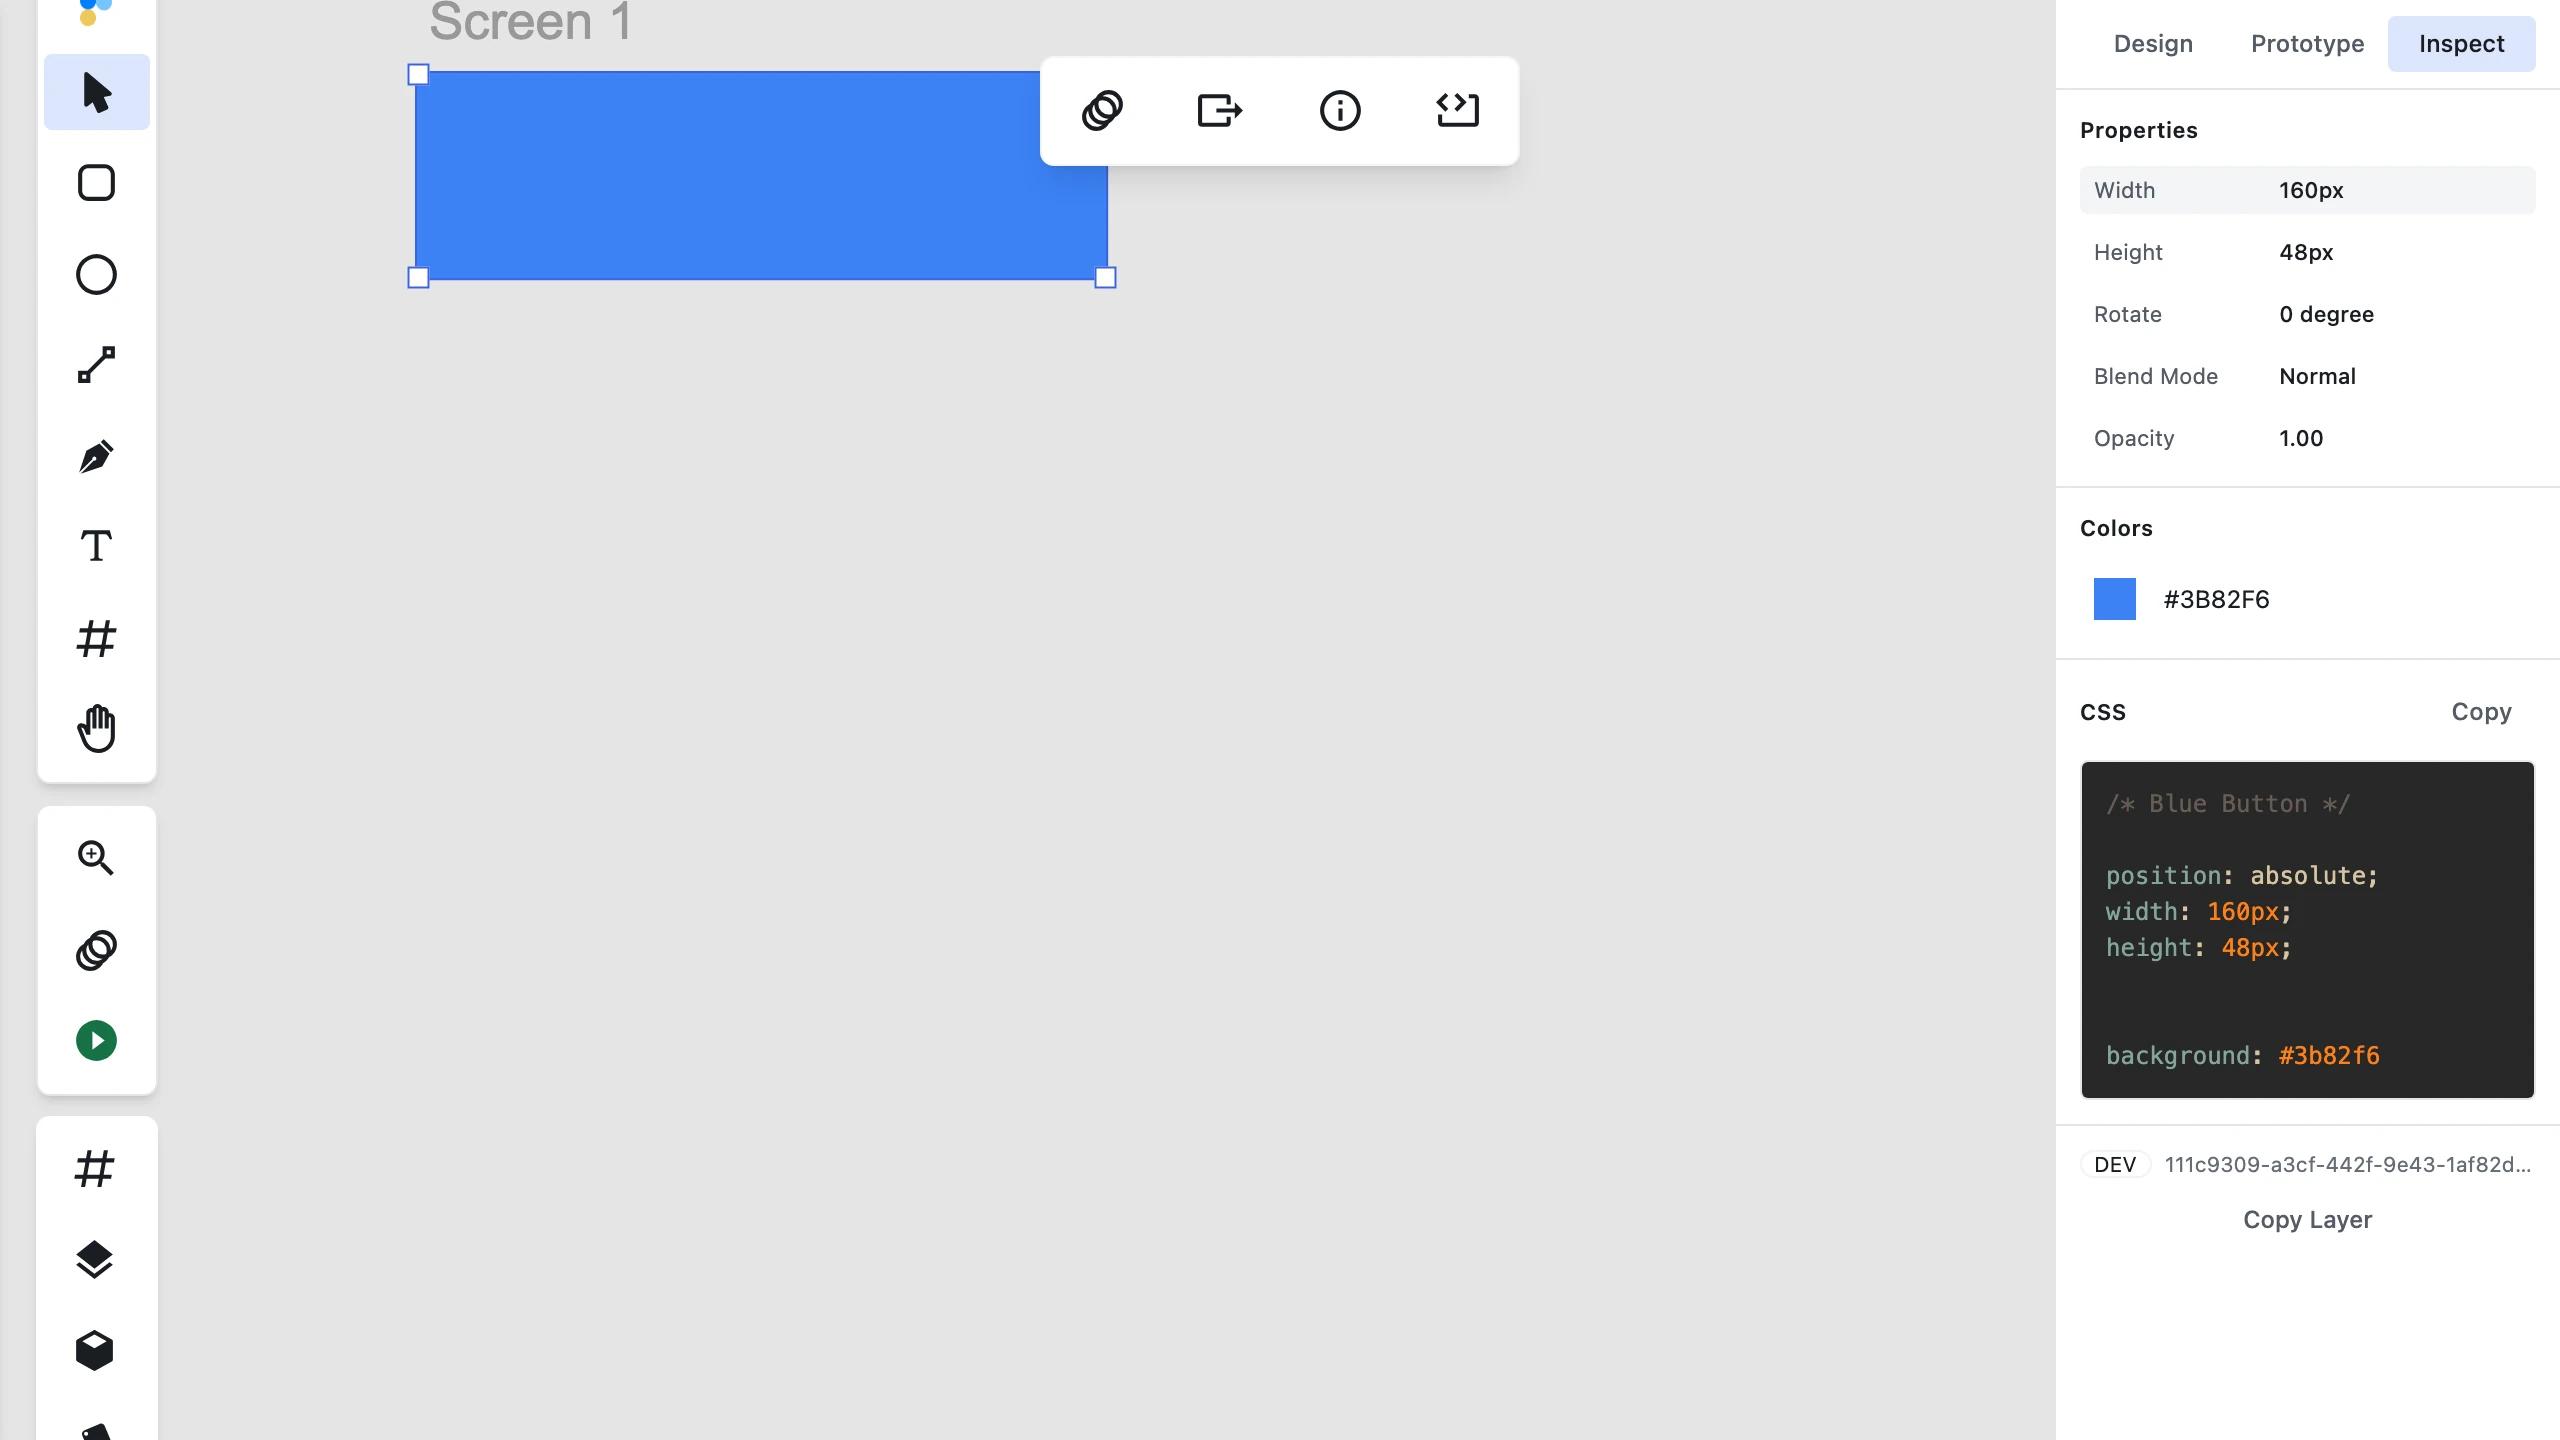

The Inspect tool is essential for precise measurements and design implementation, accessed via the Inspector's Inspect tab:
Measurements
- Get exact dimensions
- Measure distances between elements
- Check spacing and alignment
- Verify angles and rotations
Color Information
- Extract exact color values with one-click copy
- Copy in various formats (HEX, RGB, HSL)
- Check opacity values
- Identify gradients
Typography Details
- Font family and weight with copy support
- Text size and line height
- Letter spacing and alignment
- Style information
CSS Code Generation
- Generated per-layer CSS declarations with syntax highlighting
- One-click copying of CSS rules directly to the clipboard
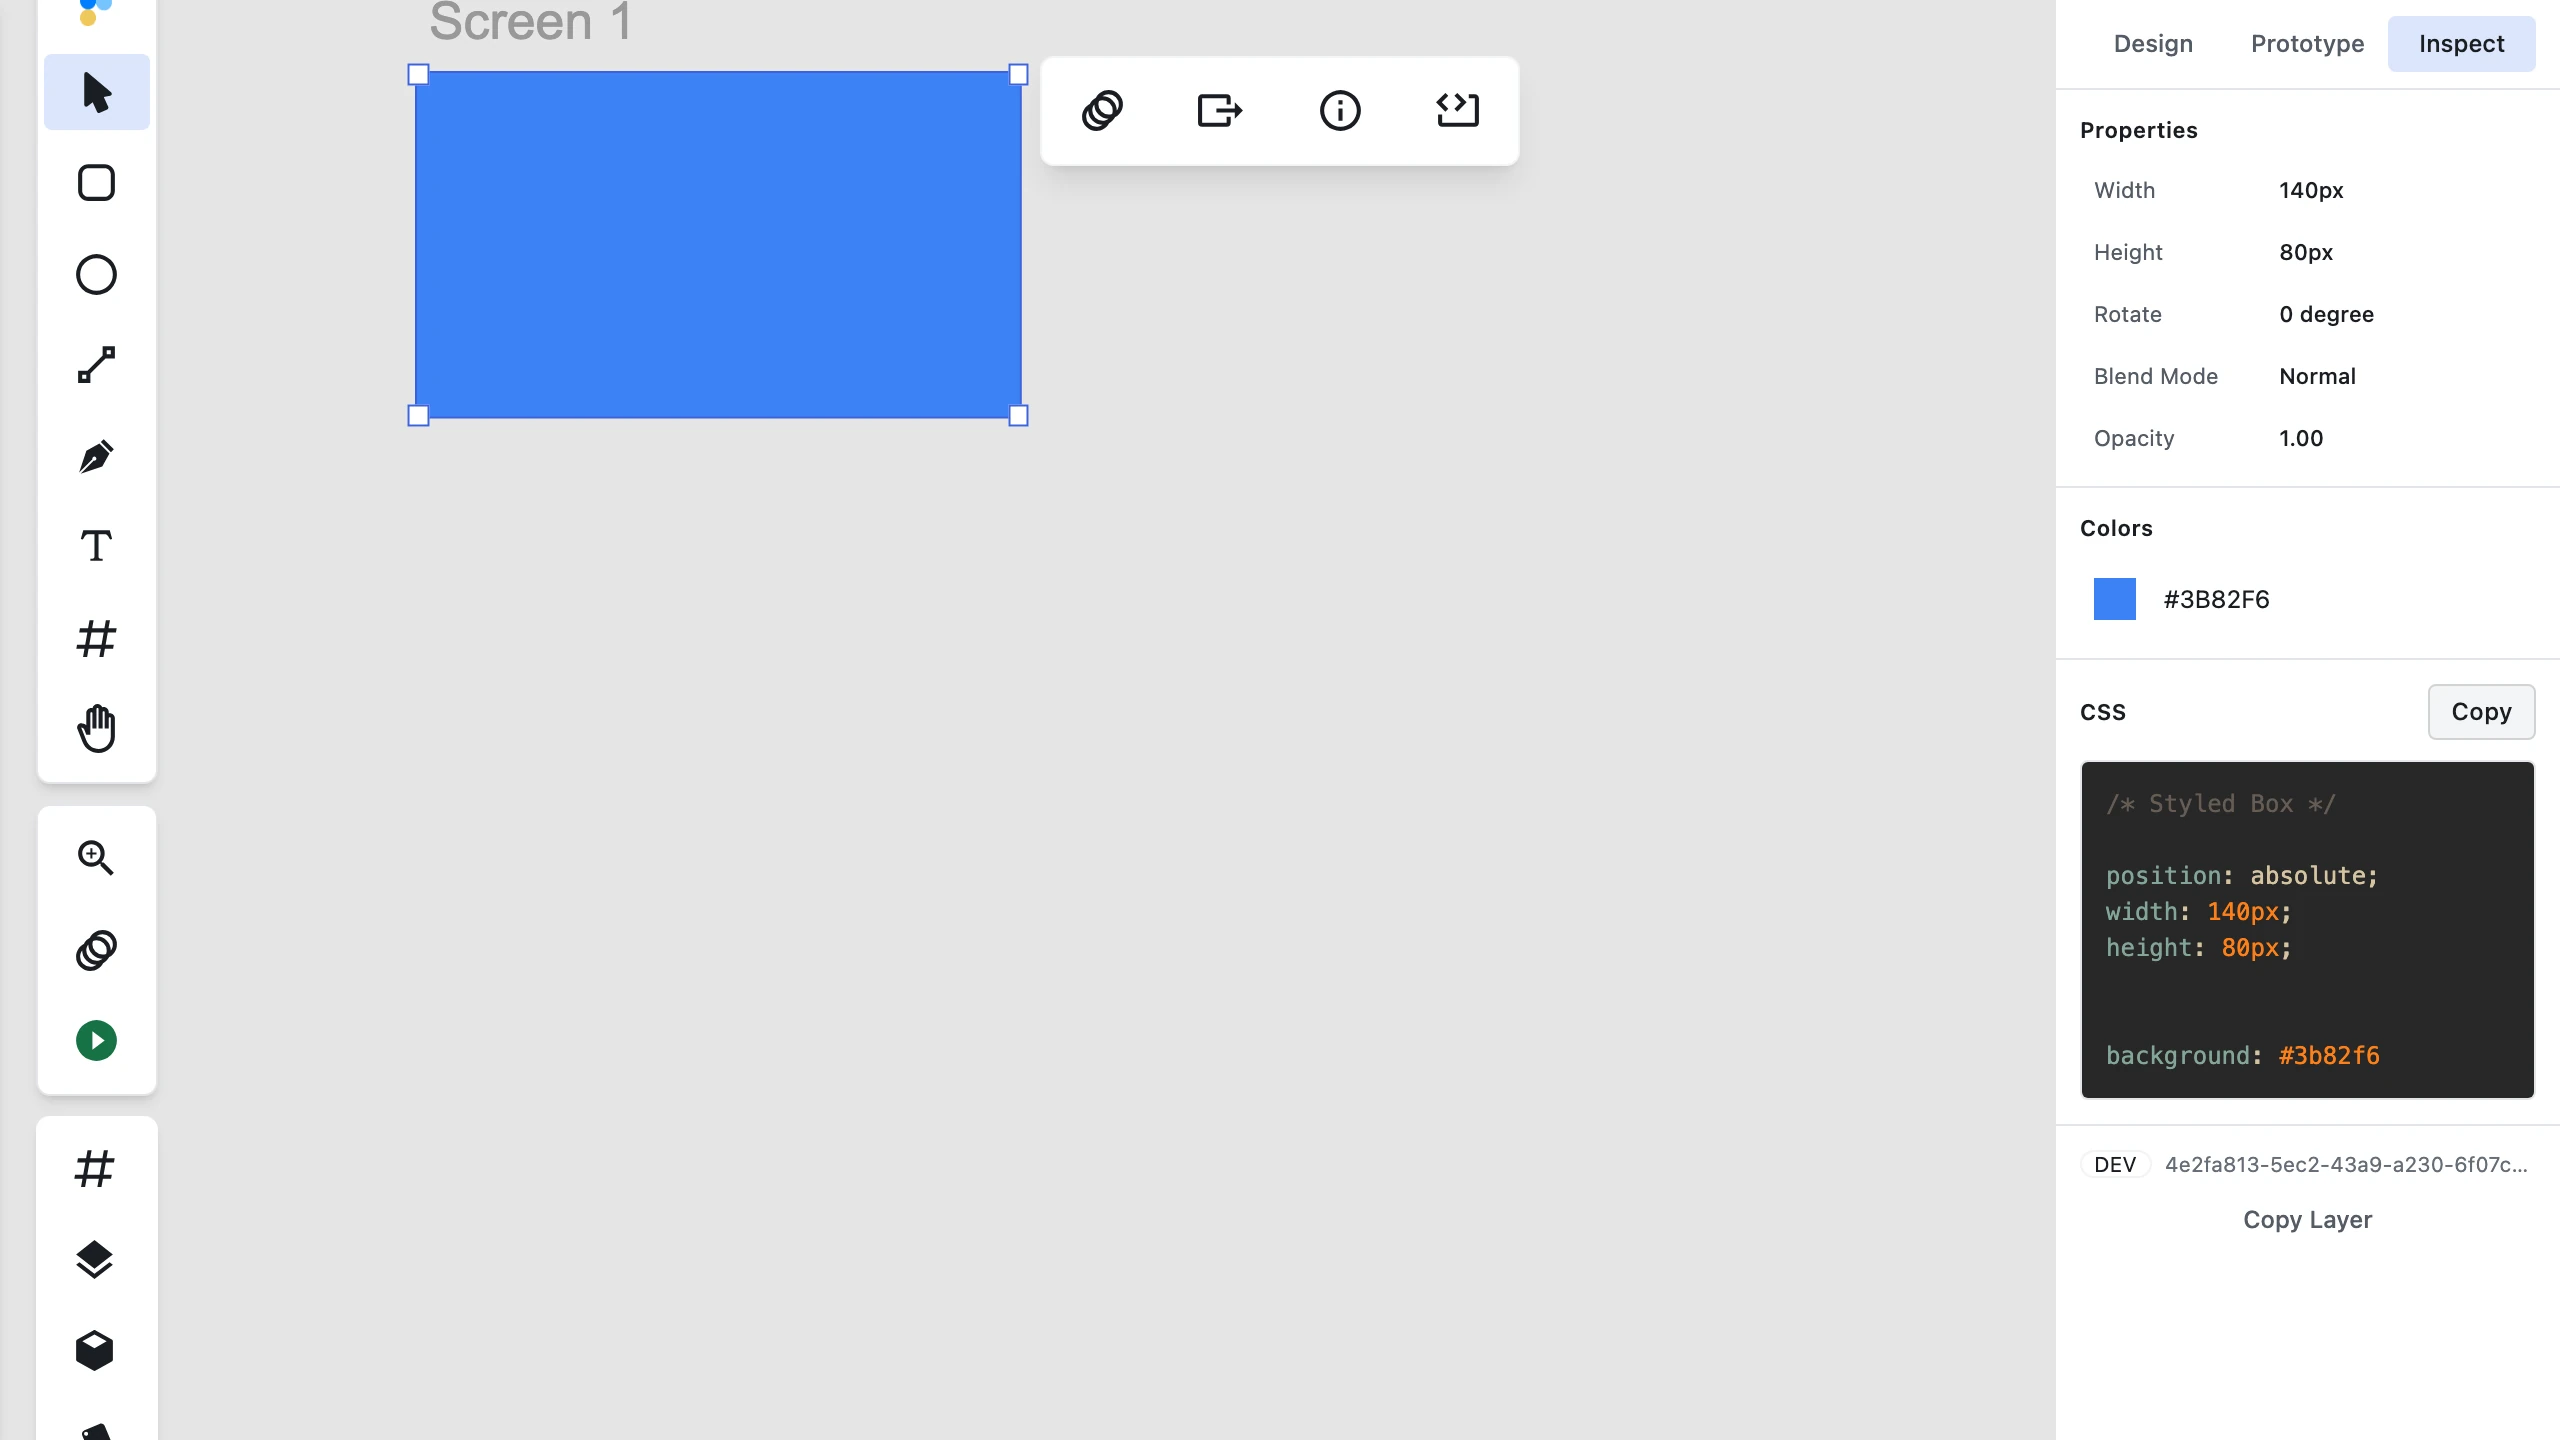
Learn more: Inspect Tool in Figpea
Advanced Transform Operations
Precise Transformations
- Numeric input for exact positioning
- Rotation with degree precision
- Scale with percentage values
- Mirror and flip operations
Transform Options
- Transform from different origins
- Scale from specific points
- Maintain proportions
Group Transformations
- Transform multiple layers
- Maintain relative positions
- Group scaling behaviors
- Aligning and distributing layers
Edit Scale X and Scale Y percentage fields directly in the inspector Position section to set group scale factors, or click Reset Scale (⟲) to reset the group to 100% scale anchored at top-left without baking or altering child local transforms.
Learn more: Transform Tool in Figpea
For per-child reflow instead of uniform group scaling, see Constraints & Resizing.
Repeat
Repeat places evenly spaced copies of a layer along a path, around a ring, or in a grid. Every numeric parameter row features a range slider paired alongside its numeric input field. Your original layer stays where it is. Output copies can be created as independent clones (default) or linked component instances (opt-in).
How to Apply Repeat
To apply Repeat, select your layer, open the Inspector, and navigate to Shape → Repeat…. Choose your mode (Along Path appears as Path in the mode switch):
Along Path: Select the path to repeat along from the Path dropdown (any other path shape on your page), set the Count, then Apply. Copies space evenly along the path, and each copy turns to follow the path's direction.

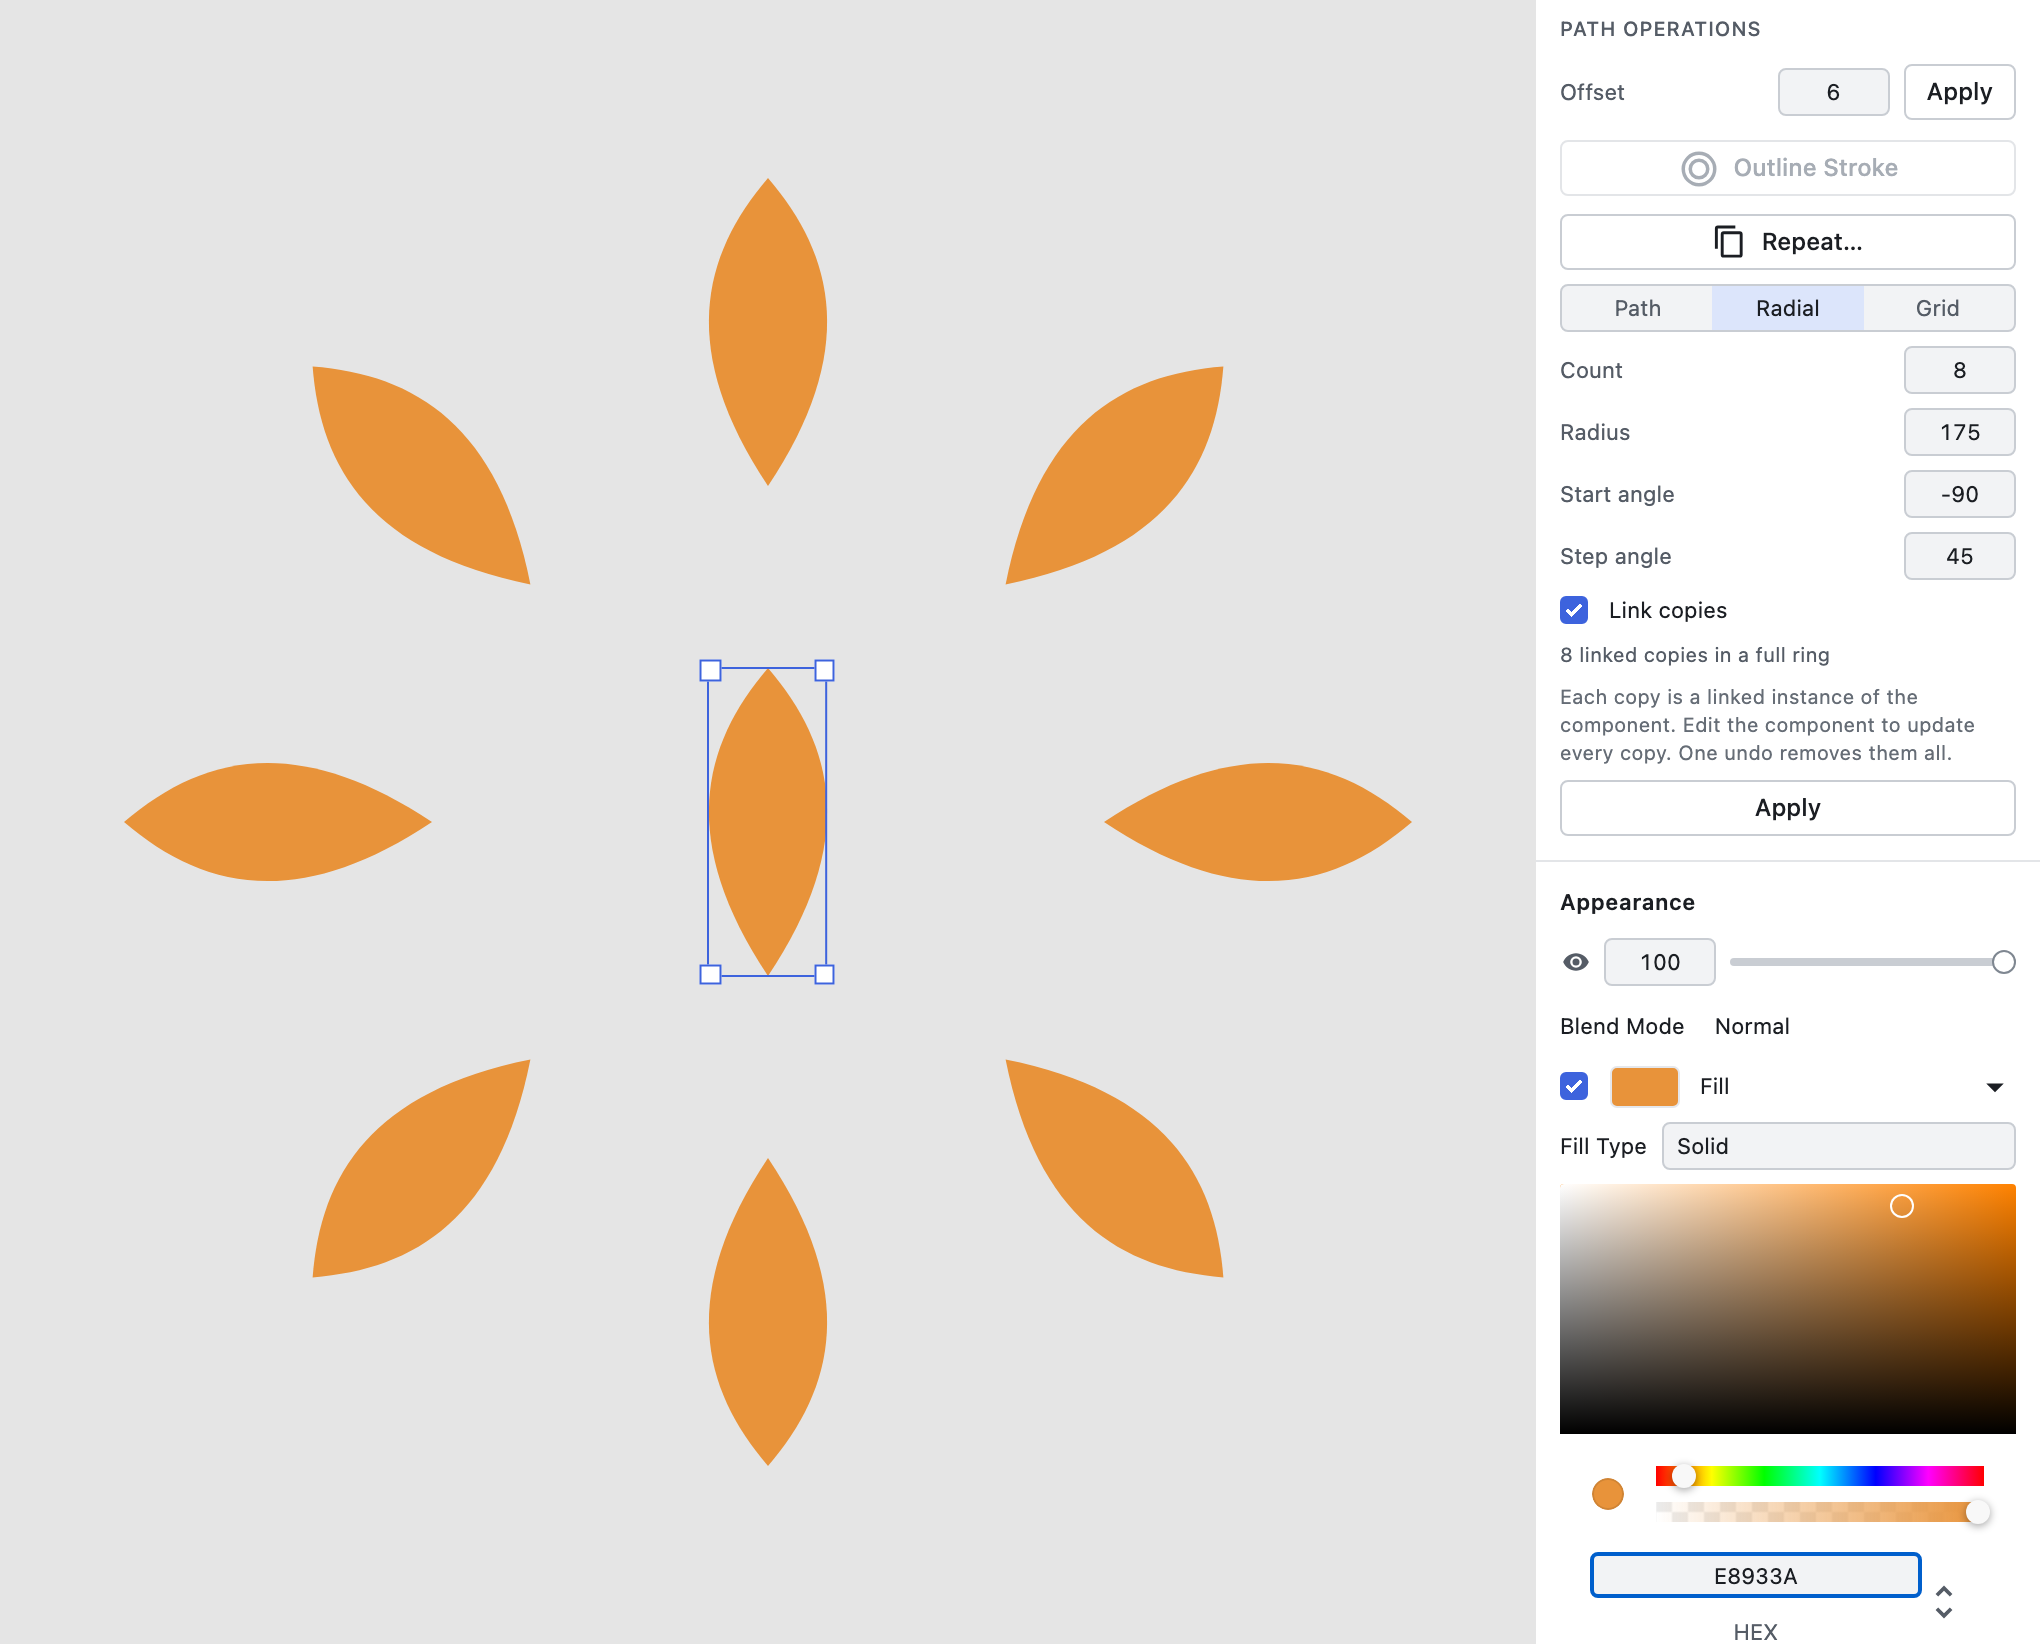
Radial: Set the Count, Start angle, and Step angle, then Apply. Copies arrange around a ring.
Grid: Set the Rows, Columns, and Spacing (the gap in pixels between copies), then Apply. Copies fill to the right and down.
Every numeric parameter — Count, Radius, Start angle, Step angle, Rows, Columns, and Spacing — pairs a range slider alongside its numeric input field (label · slider · number input), so you can drag to explore the parameter space instead of typing a value, checking the canvas, and retyping.
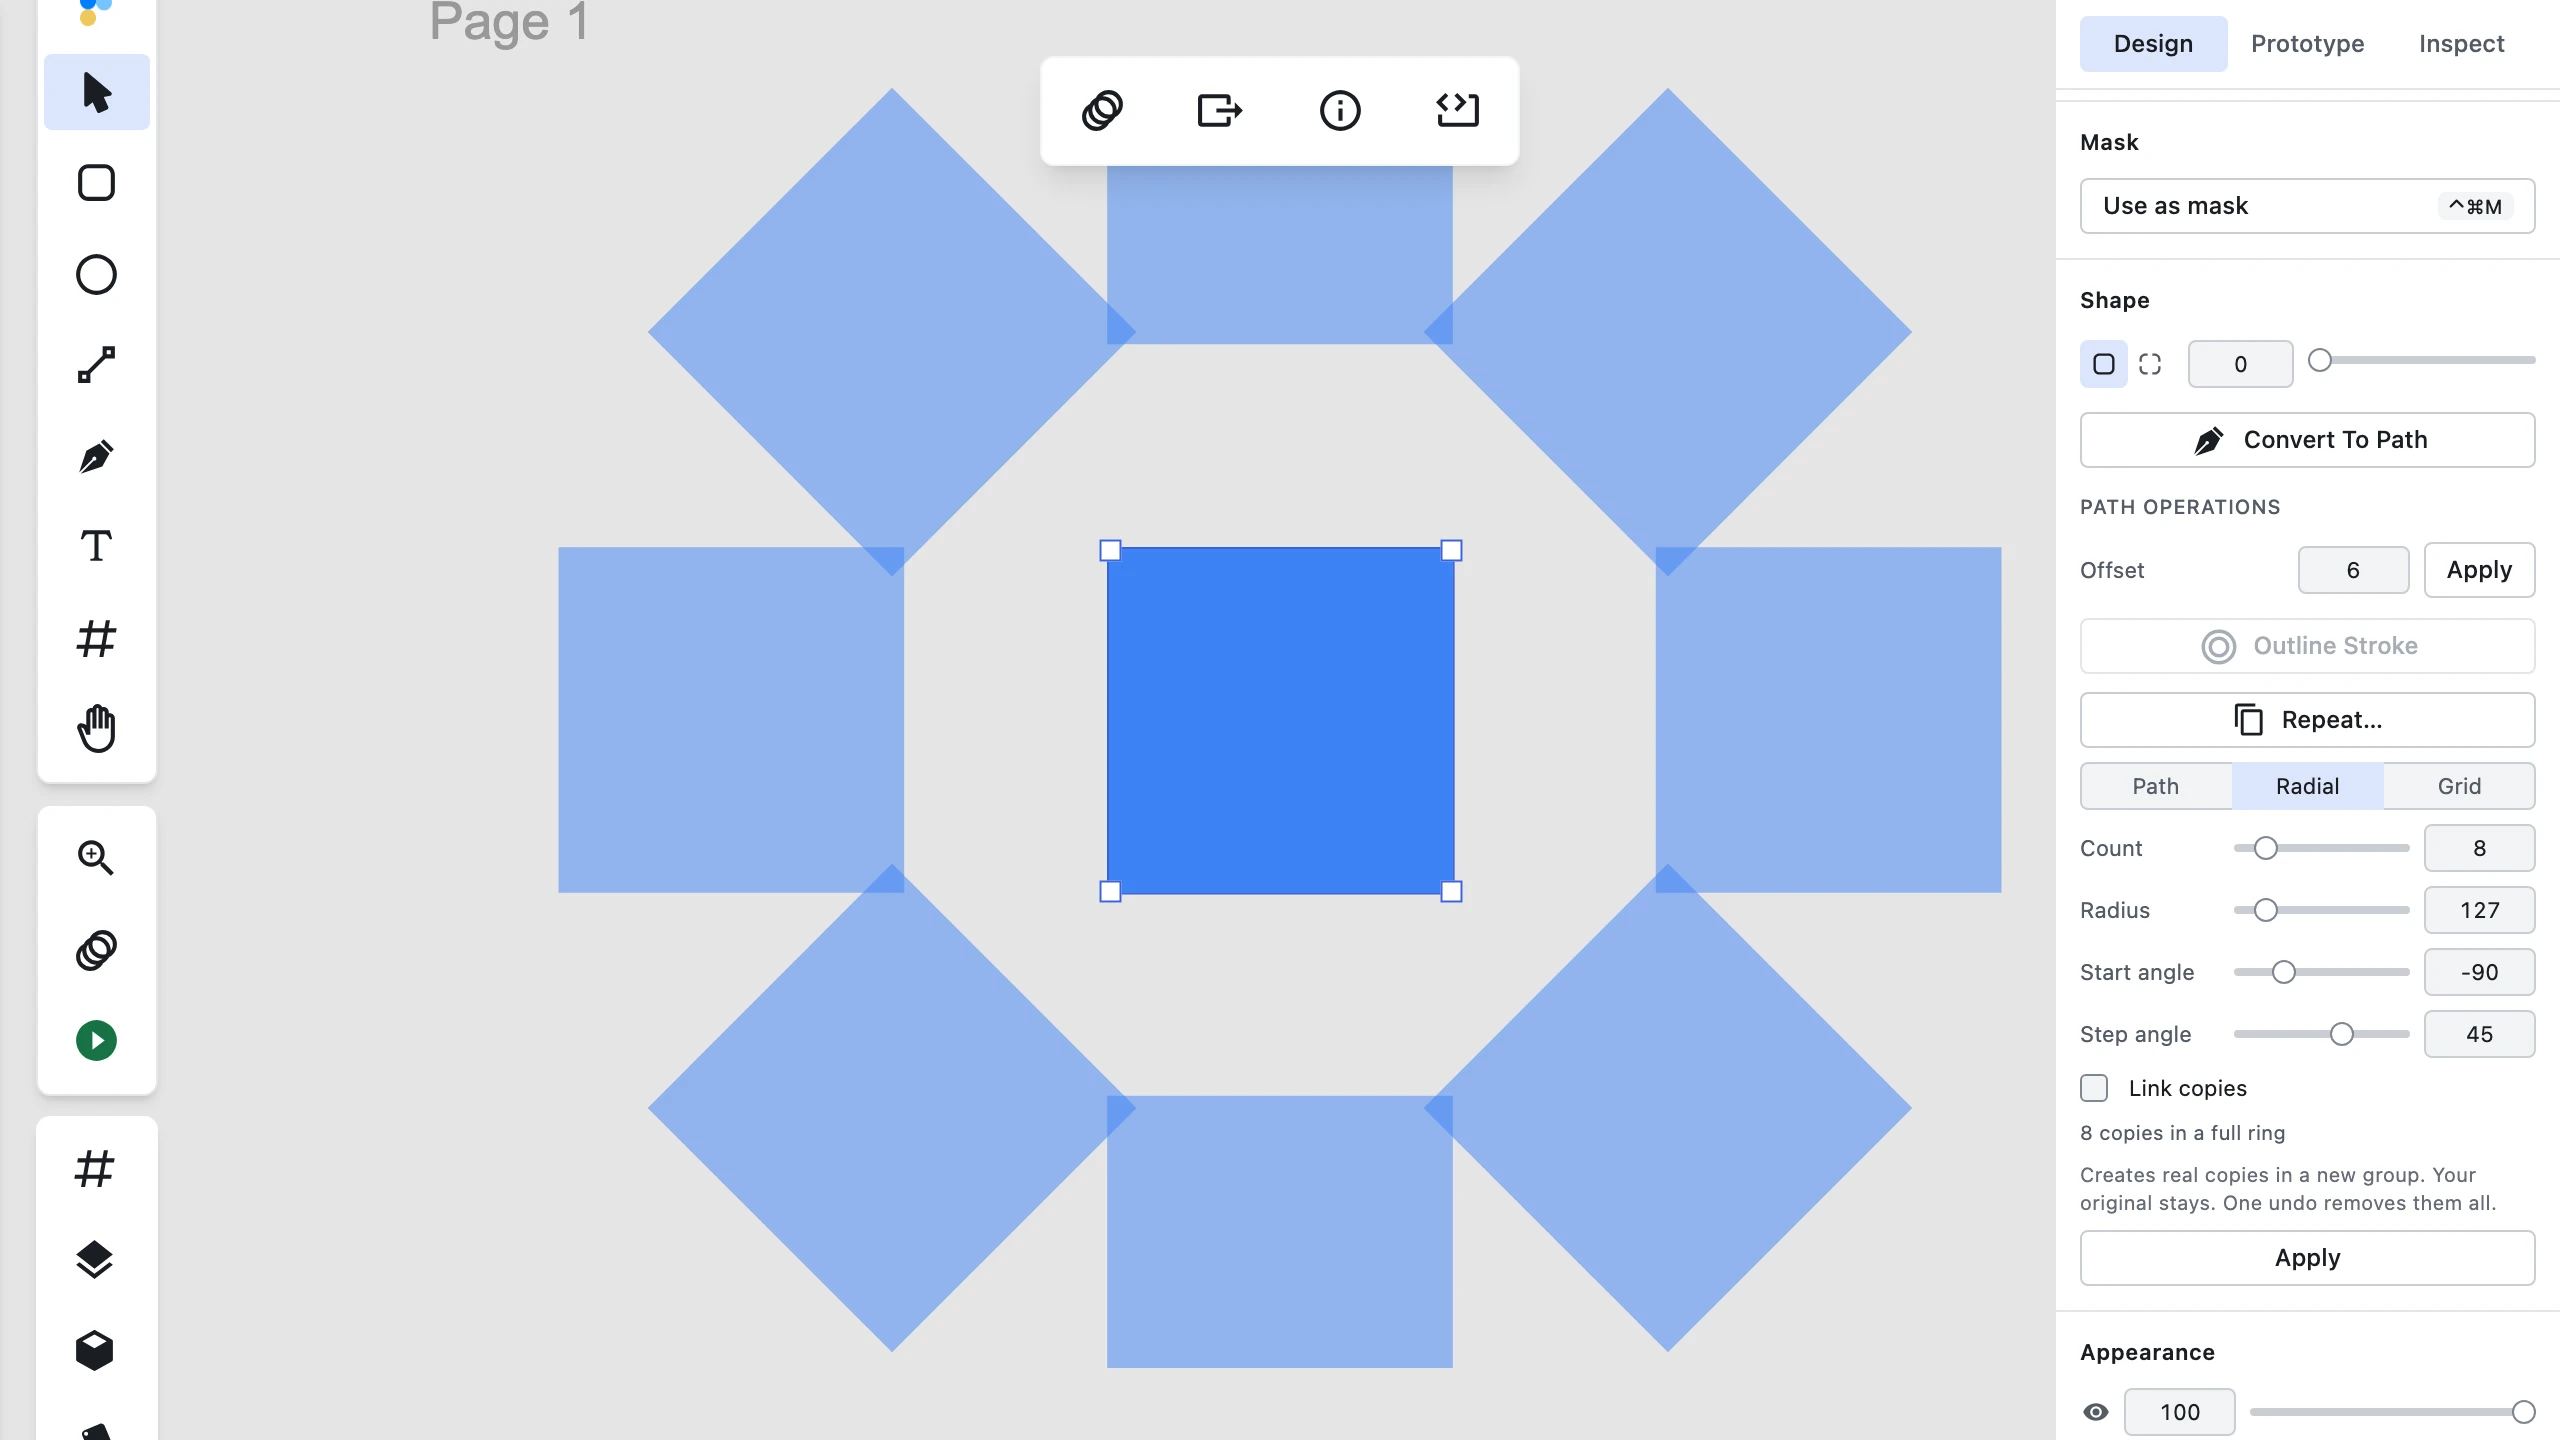
Live On-Canvas Preview
Whenever the Repeat… panel is expanded, temporary 50% opacity ghost shapes of your selected layer appear on the canvas overlay in real-time as you adjust parameters:
- Path Mode: Scrubbing Count or switching Path selection updates copy positions and counts instantly along the curve.
- Radial Mode: Adjusting Count, Radius, Start angle, or Step angle re-renders the ring layout live.
- Grid Mode: Modifying Rows, Columns, or Spacing updates the matrix preview immediately.
Dragging any Repeat slider continuously updates the paired numeric field and re-renders the ghost preview in real time — the update happens throughout the drag, not only when you release it. Typing directly into the field remains fully supported for exact entry, math expressions (e.g. 360/12), and values beyond the slider's practical drag range (Count up to 500, Radius/Spacing past 1000/200): typing a value past the slider's maximum pins the slider thumb at the track end while it never clamps or rewrites the typed value everywhere else. Dragging the Radius, Step angle, or Spacing slider sets that field's dirty flag to stop auto-tracking Count, exactly like typing a value into it.

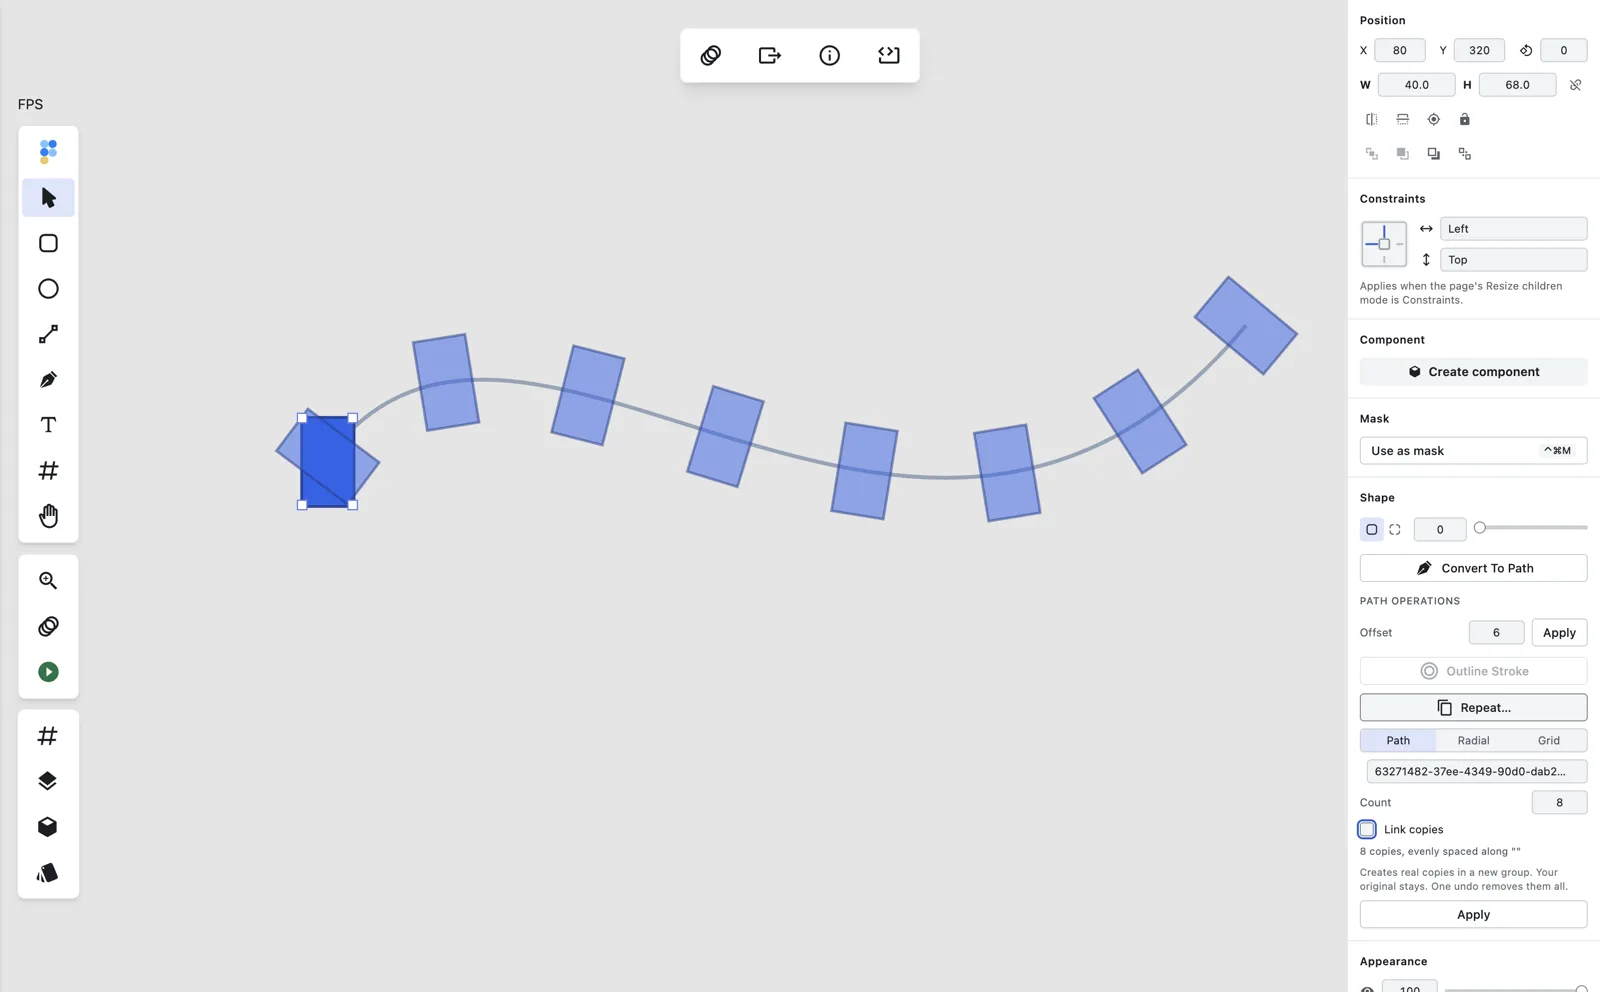
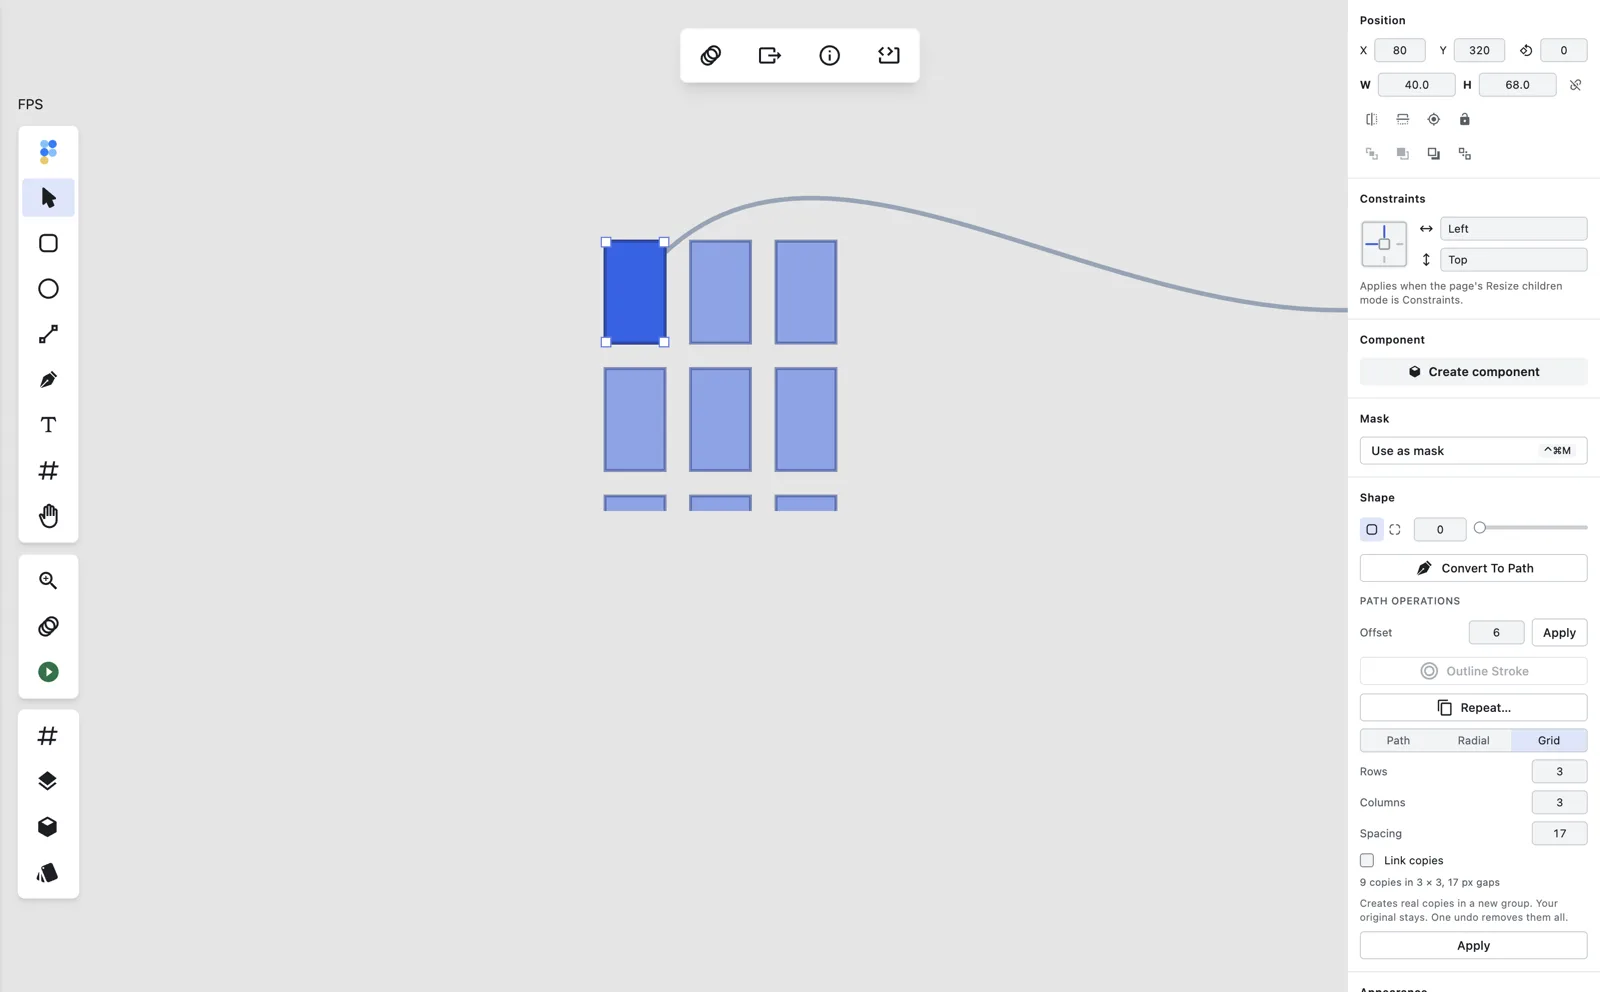

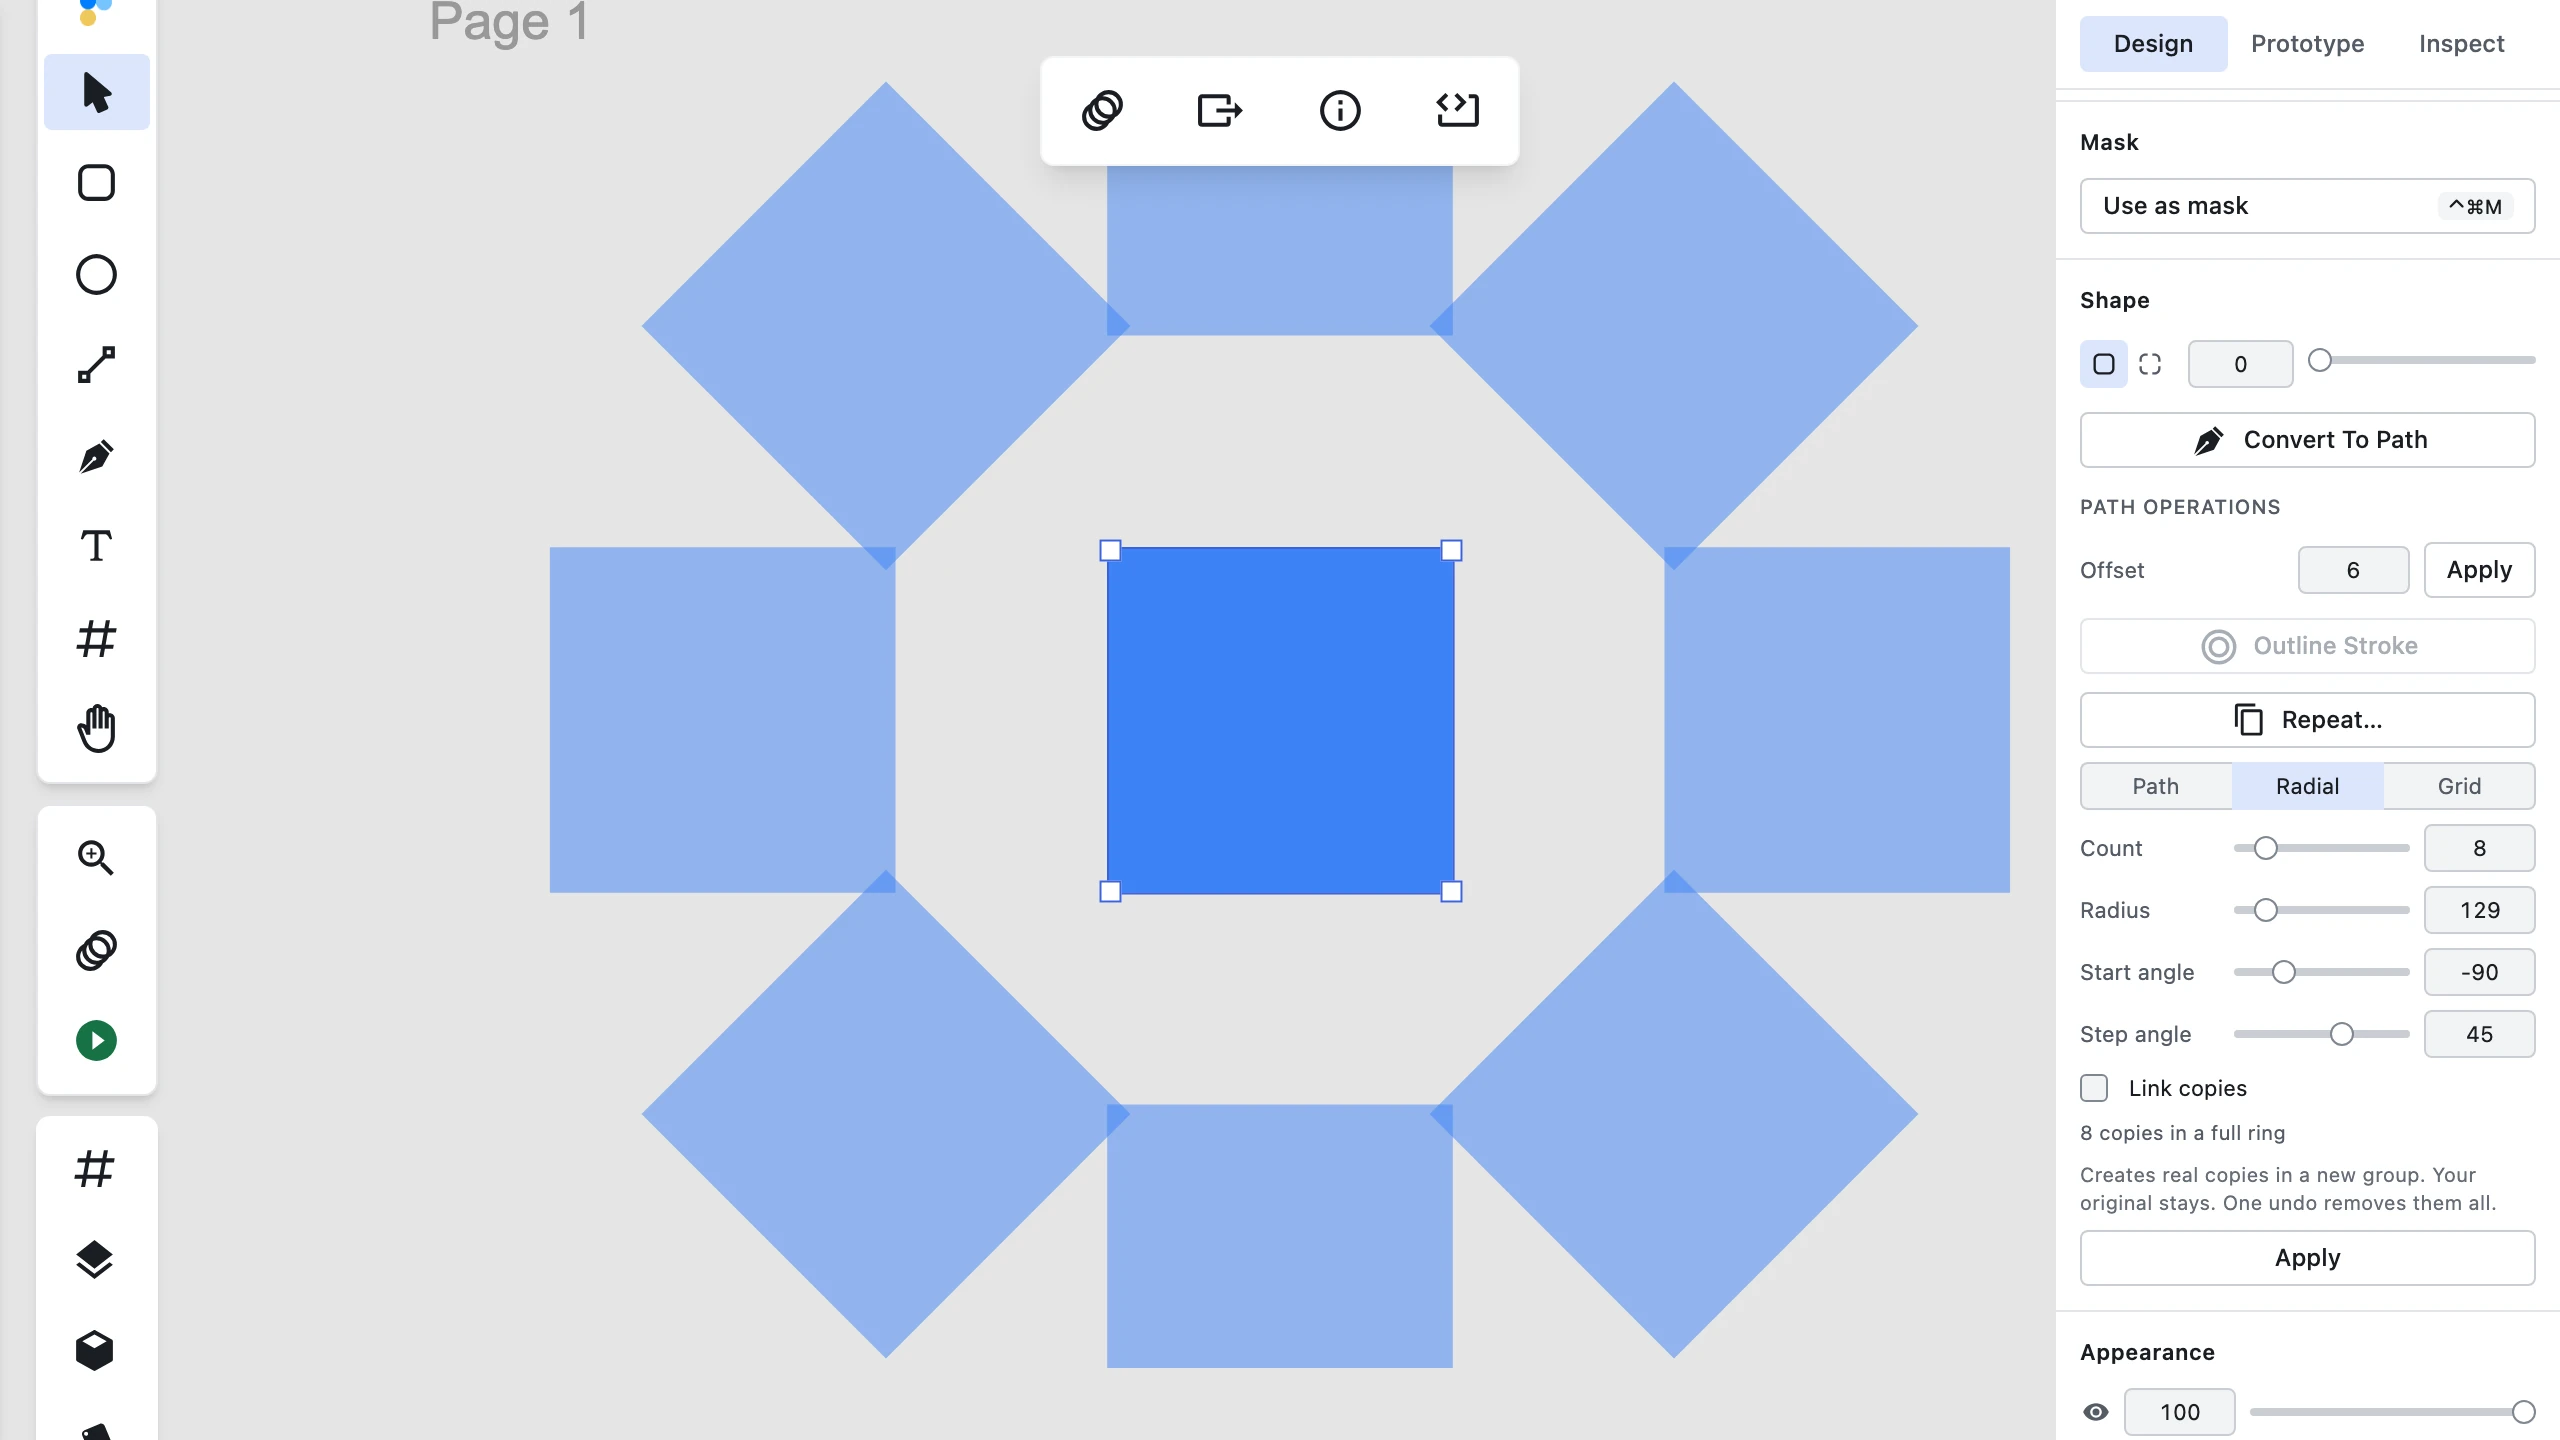
Preview ghost shapes are non-interactive (pointer-events: none), so mouse and canvas interactions pass through normally. Closing the panel, selecting another layer, or clicking Apply immediately removes the preview overlay.
Linked Instances vs Independent Clones
In the Repeat panel, use the Link copies toggle to choose how your repeated shapes behave:
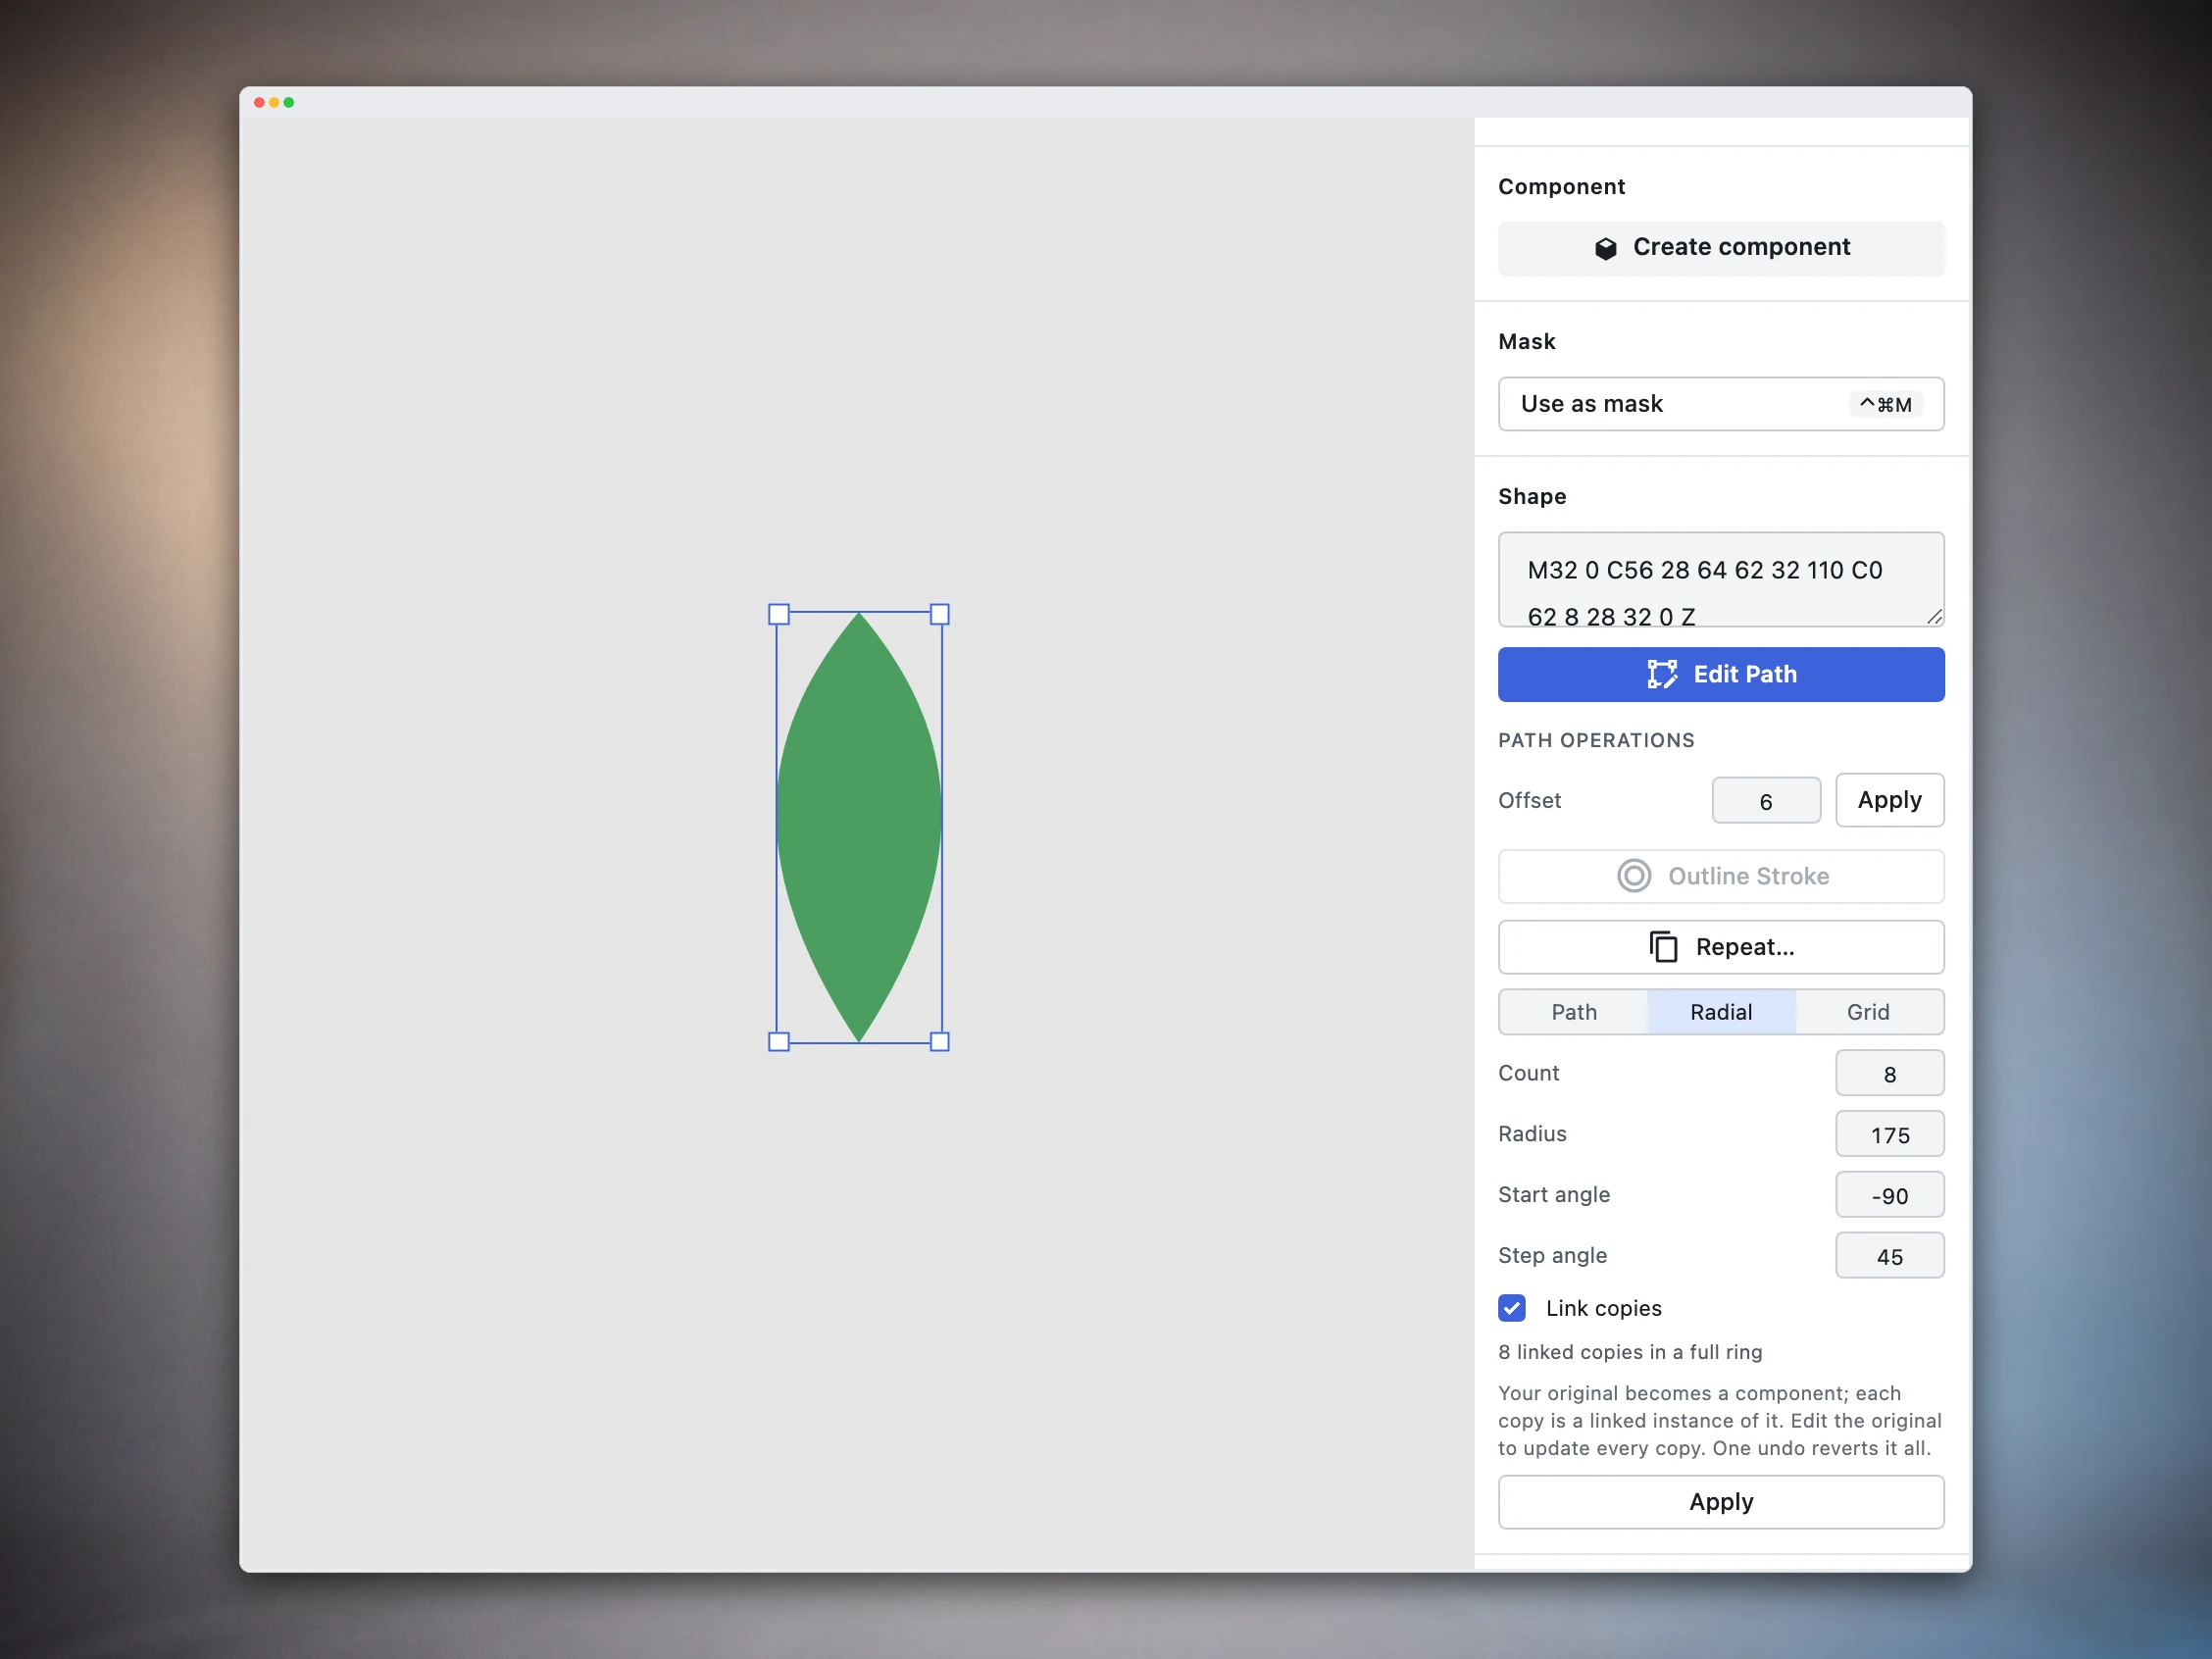
- Independent Clones (Toggle OFF — Default): The output is real, editable layers — not a live pattern, not a symbol/instance set. Editing the original or one copy does not affect the others.
- Linked Instances (Toggle ON — Opt-in): Converts a plain original layer into a component master (or reuses an existing component) and places bridged component instances. Editing the source component master automatically updates the visual content, fill, and style of every repeated instance at once.
Where Your Copies Land
All three modes create a new group named <layer name> repeat, placed next to the original in the same folder. When Link copies is OFF (default), the copies inside are real, independent layers — you can edit, move, or delete individual copies like any other layers. When Link copies is ON, each layer inside the group is instead a bridged component instance linked to the source master.
Important: Placed Once, Not Live
Repeat places your copies once when you apply. Editing the path afterward (for Along Path) or moving or resizing the original layer won't update the copies — they stay as placed, not live. A single undo step removes the entire group of copies, and — when Link copies converted the source into a component — restores it back to a plain layer, all in one step.
When Link copies is enabled, editing the visual content of the source (such as changing fill colors or internal vector paths) still updates every linked instance at once — only the layout is placed once; visual content is not.
Along Path mode requires another shape layer on your page to select as the path to repeat along. The Path dropdown lists all other shape layers. Up to 500 copies at a time: in Along Path and Radial, a Count above 500 is clamped to 500; in Grid, a Rows × Columns product above 500 is refused — Apply stays disabled and the panel tells you the limit — rather than being trimmed for you.
See Vector Operations below for Boolean operations and Outline Stroke. For more on drawing and editing the path you repeat along, see Path Edit Widget. For a single copy of a layer as an independent clone, use Duplicate. When exporting your design with the repeated copies, see Exporting.
Aligning and distributing layers
The Align section of the properties panel makes it easy to arrange multiple layers with precision, ensuring consistent spacing and alignment across your design.
Choosing what to align
You can align multiple layers in several ways:
- Click multiple layers on the canvas or in the layer list using standard multi-select to select multiple layers
- Drag a selection box on the canvas to select multiple layers at once
- Select a folder or group to align all visible, unlocked layers within it
Alignment
Use these six alignment operations to arrange layers precisely. Each operation aligns all selected layers to a common reference:
| Operation | What it does | Axis |
|---|---|---|
| Align left | Aligns all layers to the leftmost edge | Horizontal |
| Align horizontal centers | Aligns all layers to the horizontal center of the selection | Horizontal |
| Align right | Aligns all layers to the rightmost edge | Horizontal |
| Align top | Aligns all layers to the topmost edge | Vertical |
| Align vertical centers | Aligns all layers to the vertical center of the selection | Vertical |
| Align bottom | Aligns all layers to the bottommost edge | Vertical |
For edge-based alignment operations, layers align to the outermost item's edge. For center-alignment operations, all layers align to the center point of the entire selection's bounding box.
Distributing with equal gaps
When you have three or more layers selected, the distribute operations spread them evenly. The distribute buttons equalise the gaps between adjacent layers — the two outermost layers stay in place.
Equalizing size

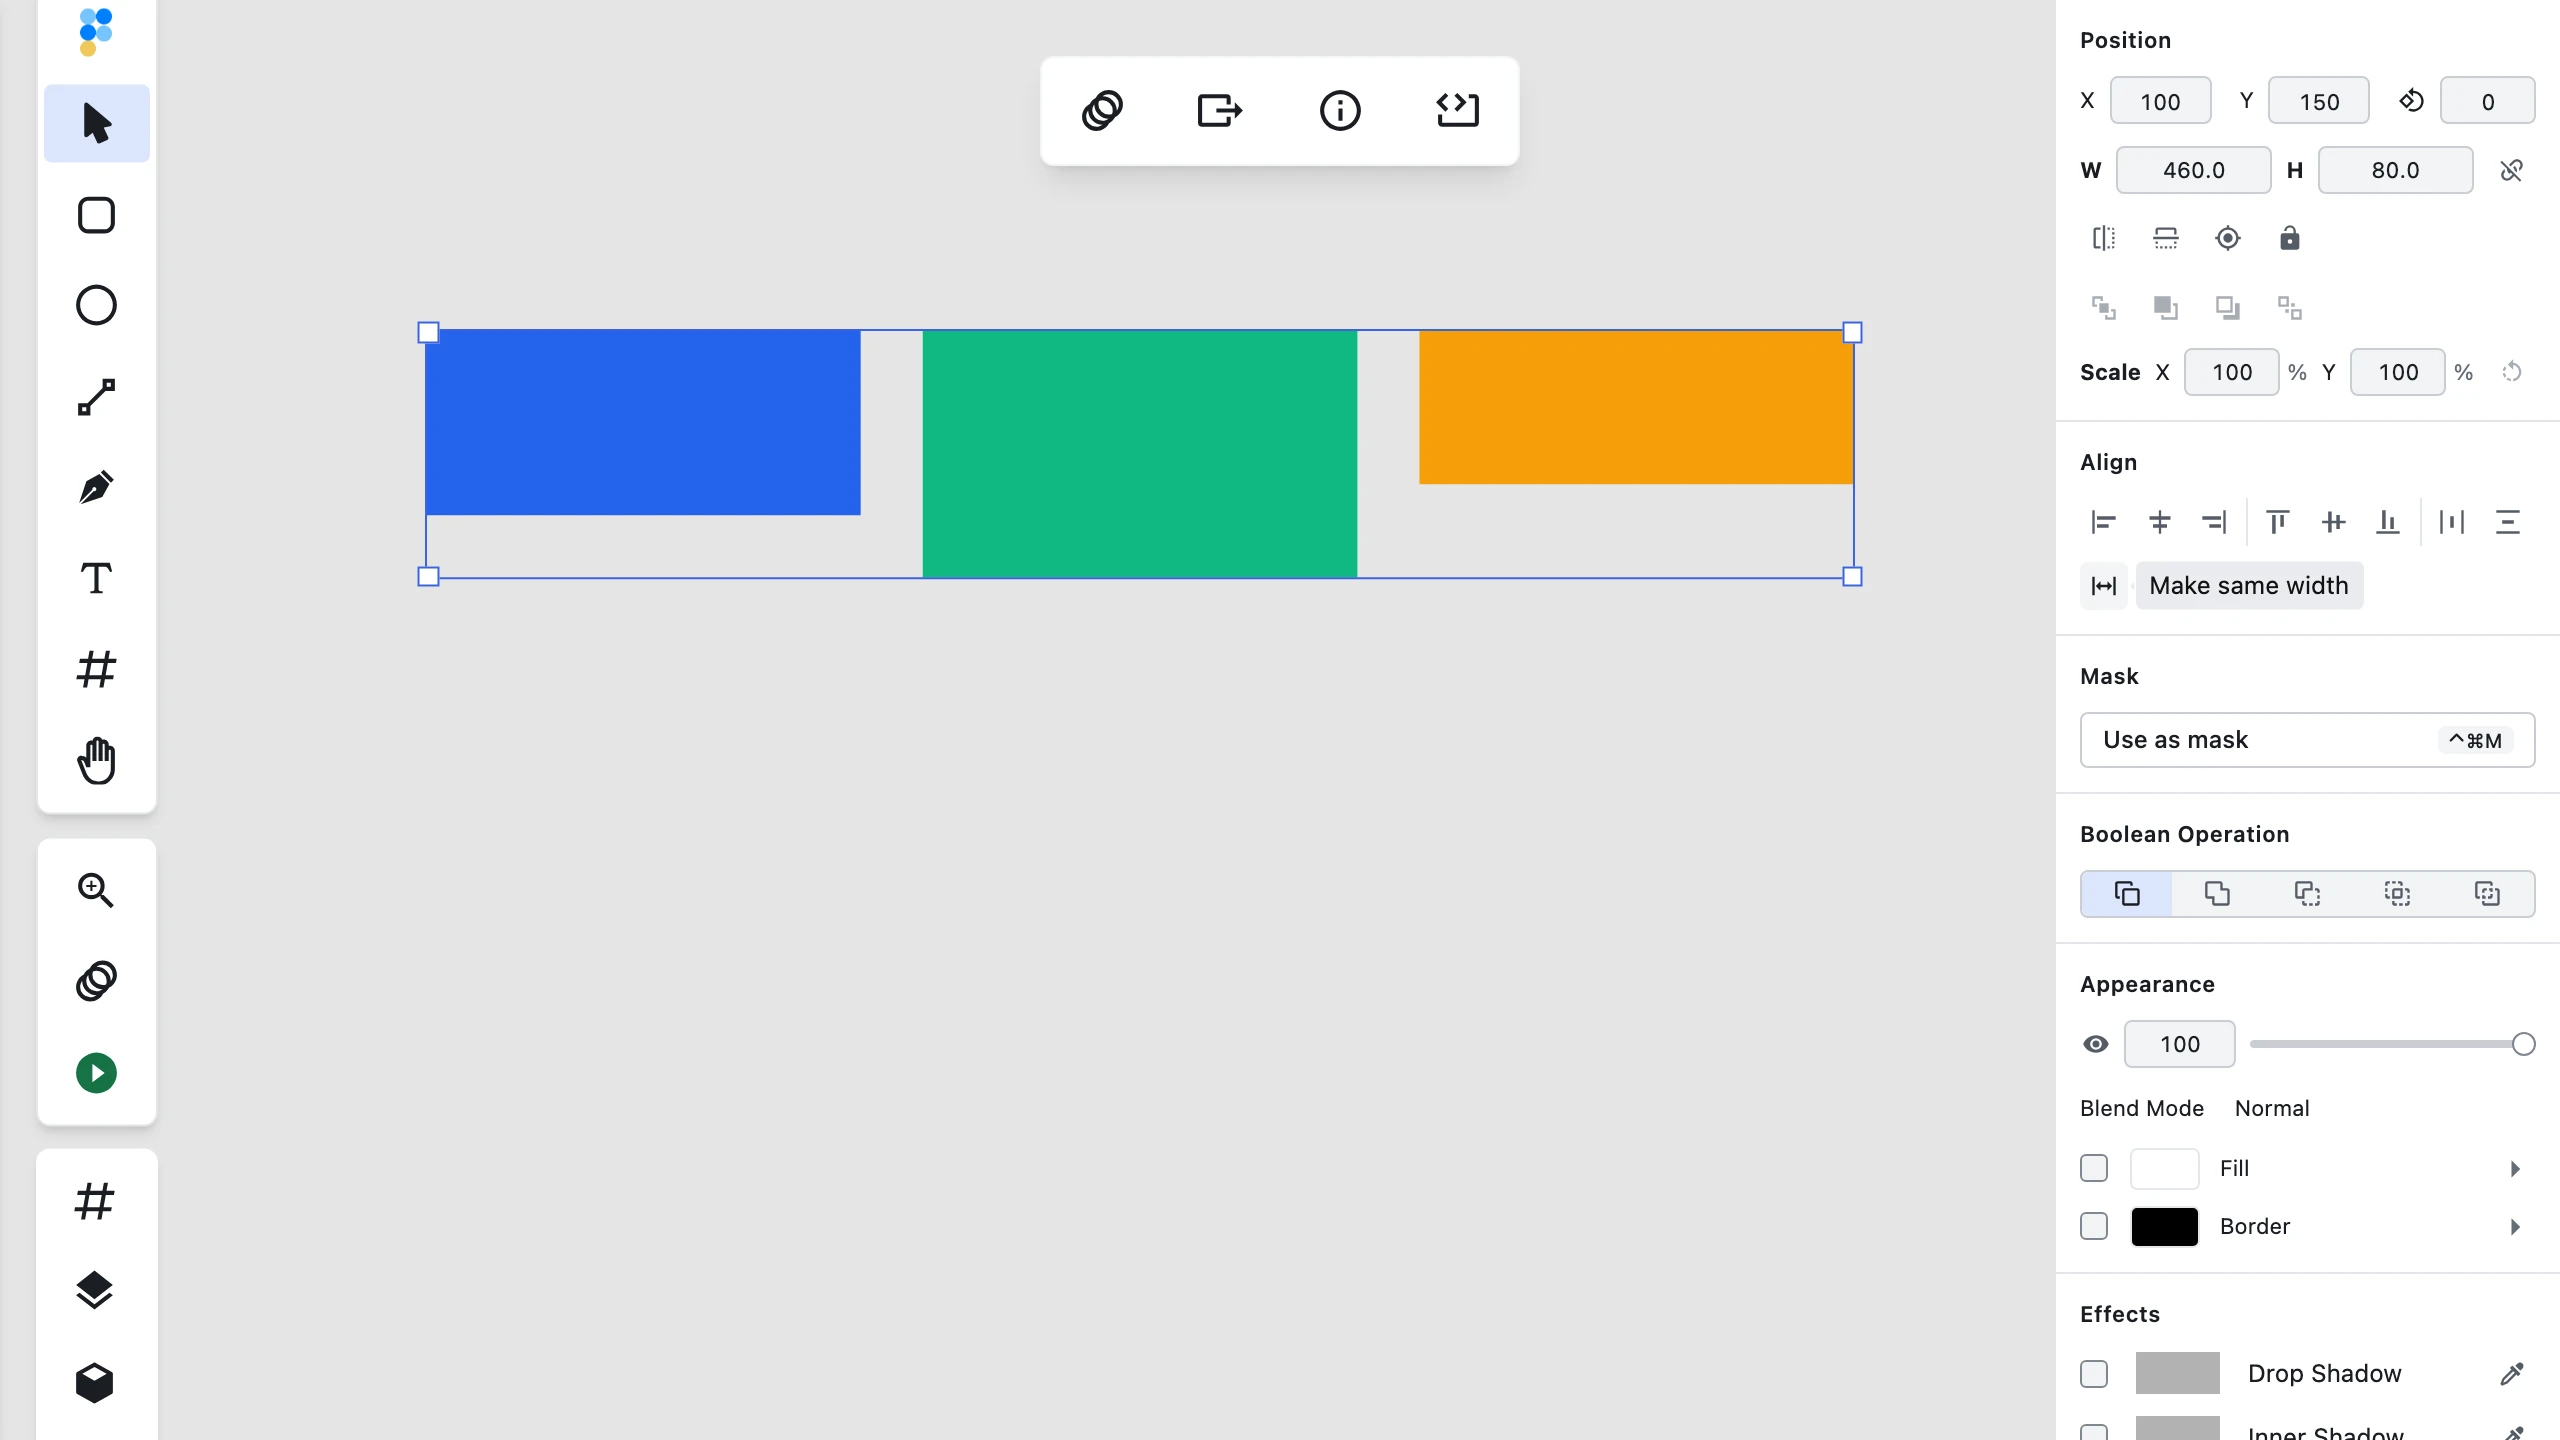
When you have two or more layers selected, the equalize operations make all selected layers match the largest layer's dimension in the selection.
| Operation | What it does | Axis |
|---|---|---|
| Make same width | Resizes every selected layer so its width matches the widest layer in the selection | Horizontal |
| Make same height | Resizes every selected layer so its height matches the tallest layer in the selection | Vertical |
What to expect
- Rotated and skewed layers align based on their upright bounding box, not their rotated visual bounds. This is the same basis that measurement and snapping use — it's intentional for consistency.
- Locked and hidden layers are skipped and do not move. They also don't count toward the selection when determining alignment reference points.
- One undo step reverts the entire alignment or distribution operation, restoring all moved layers to their previous positions.
- Distribute operations create equal gaps between adjacent layer edges, not equal spacing between layer centers.
- Equalizing size (Make same width/height) resizes every alignable layer to match the largest one in the selection, changing only the targeted dimension — the other stays exactly as it was. Each layer's top-left corner stays fixed, rotated and skewed layers included. Locked and hidden layers are skipped here too, and one undo restores every layer's original size.
Frequently asked questions
Why don't I see the Align section?
Select two or more layers, or a folder/group containing at least two, to reveal the Align section of the properties panel.
Why are the distribute buttons greyed out?
Distributing needs three or more layers. With only two selected, the align controls are available but the distribute buttons stay disabled.
One of my layers didn't move — why?
Locked and hidden layers are skipped; unlock or unhide it and run the operation again.
Does aligning layers change my original PSD, XD, or Figma file?
No. Figpea never writes back to .psd, .xd, or .fig — your original file on disk is untouched. Export the result from Figpea instead. See Exporting to save your work.
Can I align layers across different folders?
Yes. You can select the layers you want to align using standard multi-select, regardless of which folder they're in. Only visible and unlocked layers will participate in the alignment.
What happens if all my layers are already aligned?
If all layers are already in the target alignment position, the alignment operation performs no changes — clicking the button again has no effect, and no undo step is created.
What happens if all my layers are already the same size?
If every alignable layer already matches the target width or height, equalizing size makes no changes — clicking the button again has no effect, and no undo step is created.
Related
- Basic Layer Operations — moving and selecting layers
- Path Edit Widget — precise point alignment and snapping
- Exporting — save your aligned design
Layer Effects
Shadow Effects
- Drop shadows with custom settings
- Inner shadows
- Multiple shadow stacking
- Shadow color and opacity
Blur Effects
- Gaussian blur
- Background blur
- Motion blur
- Custom blur settings
Layer Styles
- Color overlays
- Gradient overlays
- Pattern fills
- Stroke effects
Advanced Selection
Smart Selection
- Select similar layers
- Select by properties
- Select contained layers
- Inverse selection
- Range selection with Shift key
- Multiple selection with Command/Ctrl key
Selection Management
- Select multiple consecutive layers with Shift + click
- Add/remove individual layers with Command/Ctrl + click
- Drag multiple selected layers together
- Maintain selection hierarchy when moving
- Quick rename selected layers with double-click
Hierarchy Navigation
- Select parent layers
- Select child layers
- Select siblings
- Select all descendants
- Smart folder expansion while dragging
- Visual drop indicators for precise placement
- Automatic folder expansion after hover delay
Enhanced Drag and Drop
- Drag multiple selected layers simultaneously
- Visual feedback for drop locations
- Smart folder interactions:
- Hover over folders to auto-expand
- Drop in middle section to nest layers
- Drop on edges to reorder
- On the canvas: hold a drag still over a page to move a layer into it (and out onto empty canvas to move it back out).
- Maintain layer group relationships
- Intelligent drop target highlighting
- Cancel drag operation with Escape key
Learn more: Layer Hierarchy Operations in Figpea
Copy & Paste Operations
Smart Layer Copying
- Copy single or multiple layers with hierarchy
- Preserve layer properties and styles
- Maintain relative positions when pasting
- Intelligent parent layer detection
- Component Master Paste Semantics:
- Plain Paste (
Cmd/Ctrl + V): Pastes a linked instance referencing the original master component (new default). - Paste a Copy (
Cmd/Ctrl + Shift + V): Pastes an independent master copy. - Canvas Context Menu Integration: Right-clicking the canvas with component master(s) on the clipboard shows both paste options with shortcuts.
- Plain Paste (
Advanced Image Pasting
-
Direct Image Pasting
- Paste images directly from any application
- Supports clipboard images from screenshots
- Maintains original image quality
- Automatic layer creation
-
Base64 Image Support
- Paste base64-encoded images
- Supports PNG, JPEG, GIF, and WebP
- Automatic format detection
- Direct conversion to layers
Position Intelligence
- Cursor-based placement
- Smart coordinate transformation
- Automatic alignment with design grid
- Parent layer context awareness
Error Handling
- Graceful handling of invalid content
- Format validation and conversion
- Automatic error recovery
- Stable operation with corrupted data
Learn more: Copy & Paste Feature in Figpea
Masking
Figpea has two mask types — Alpha and Vector. See Masks for how to read a mask in a file you opened, create one with Use as mask, switch its type, remove it, and show mask outlines.
Vector Operations
Rounding individual corners works differently: it happens on selected points inside the path editor — see Round Corners.
Path Manipulation
- Edit vector points
- Modify curves
- Join paths
- Split paths
Boolean Operations
- Unite shapes
- Subtract shapes
- Intersect shapes
- Exclude shapes
Outline Stroke
Outline Stroke converts a stroked path into a filled shape that follows the stroke's width, caps and joins. The result is a normal editable path you can combine with boolean operations and export as solid vector geometry.
To apply Outline Stroke, open the Inspector, select a shape layer, and navigate to the Shape section's Path Operations group, where you'll find the Outline Stroke button. The operation is destructive, but a single undo step reverses it completely, so you can safely experiment.
Outline Stroke works on both open and closed paths. The operation declines in three cases: if your shape already has a fill, you must remove the fill first; if your border is dashed, dashed borders can't be outlined yet, as they require special handling; and if your border has zero width, you'll need to set a width above 0 before outlining.
Unlike Convert To Path, which turns a rectangle or ellipse into an editable path, Outline Stroke turns a path's stroke (border) into a filled shape that you can further edit or combine.
For more about exporting the result, see Exporting. To learn about combining shapes after outlining, see the Boolean Operations section above.
Offset Path
Offset Path grows or shrinks a shape's outline by a distance you specify. Enter a positive number to push the outline outward, or a negative number to pull it inward. This is perfect for creating concentric outlines, padding a shape, or choking and spreading strokes on badges and icons.
Offset Path lives in the Inspector's Shape section, in the Path Operations group. To apply it, type a distance in px and click Apply. The operation is destructive, but a single undo step reverses it completely, so you can safely experiment.
Rounded corners stay rounded — the operation preserves corner arcs and uses round joins where paths meet, so your design maintains its visual intent through the offset.
Offset Path works on every shape type: rectangles, ellipses, polygons, stars, and paths. If you offset a rectangle or ellipse, it converts to an editable path as part of the same step, so you can further edit or combine it with boolean operations.
There are three limits to keep in mind. An inset larger than the shape itself leaves the shape untouched rather than collapsing it. A path with more than 200 segments is declined as too complex to avoid freezing the editor. And if you have a group combined with boolean operations, you must flatten it to a path first before offsetting.
To understand the distinction: Convert To Path turns a rectangle or ellipse into an editable path without changing its outline; Outline Stroke converts a path's stroke into a filled shape; and Offset Path moves the entire outline inward or outward while keeping the shape anchored in place.
For more about exporting the result, see Exporting. To learn about combining shapes with boolean operations, see the Boolean Operations section above.
Vector Properties
- Stroke alignment
- Corner types
- Path simplification
- Vector optimization
Layer Styles
Style Management
- Create style presets
- Apply styles to multiple layers
- Update linked styles
- Import/Export styles
Advanced Blending
- Custom blend modes
- Opacity controls
Fill vs Layer opacity
Fill fades only the layer's own pixels; Opacity fades everything the layer draws, effects included.
Select a layer and find the Fill row in the inspector — it sits alongside Opacity in the same block, directly below the Opacity row. Drag the Fill slider (or type a value) to fade the fill while your stroke and drop shadow stay at full strength. The slider runs 0–100.
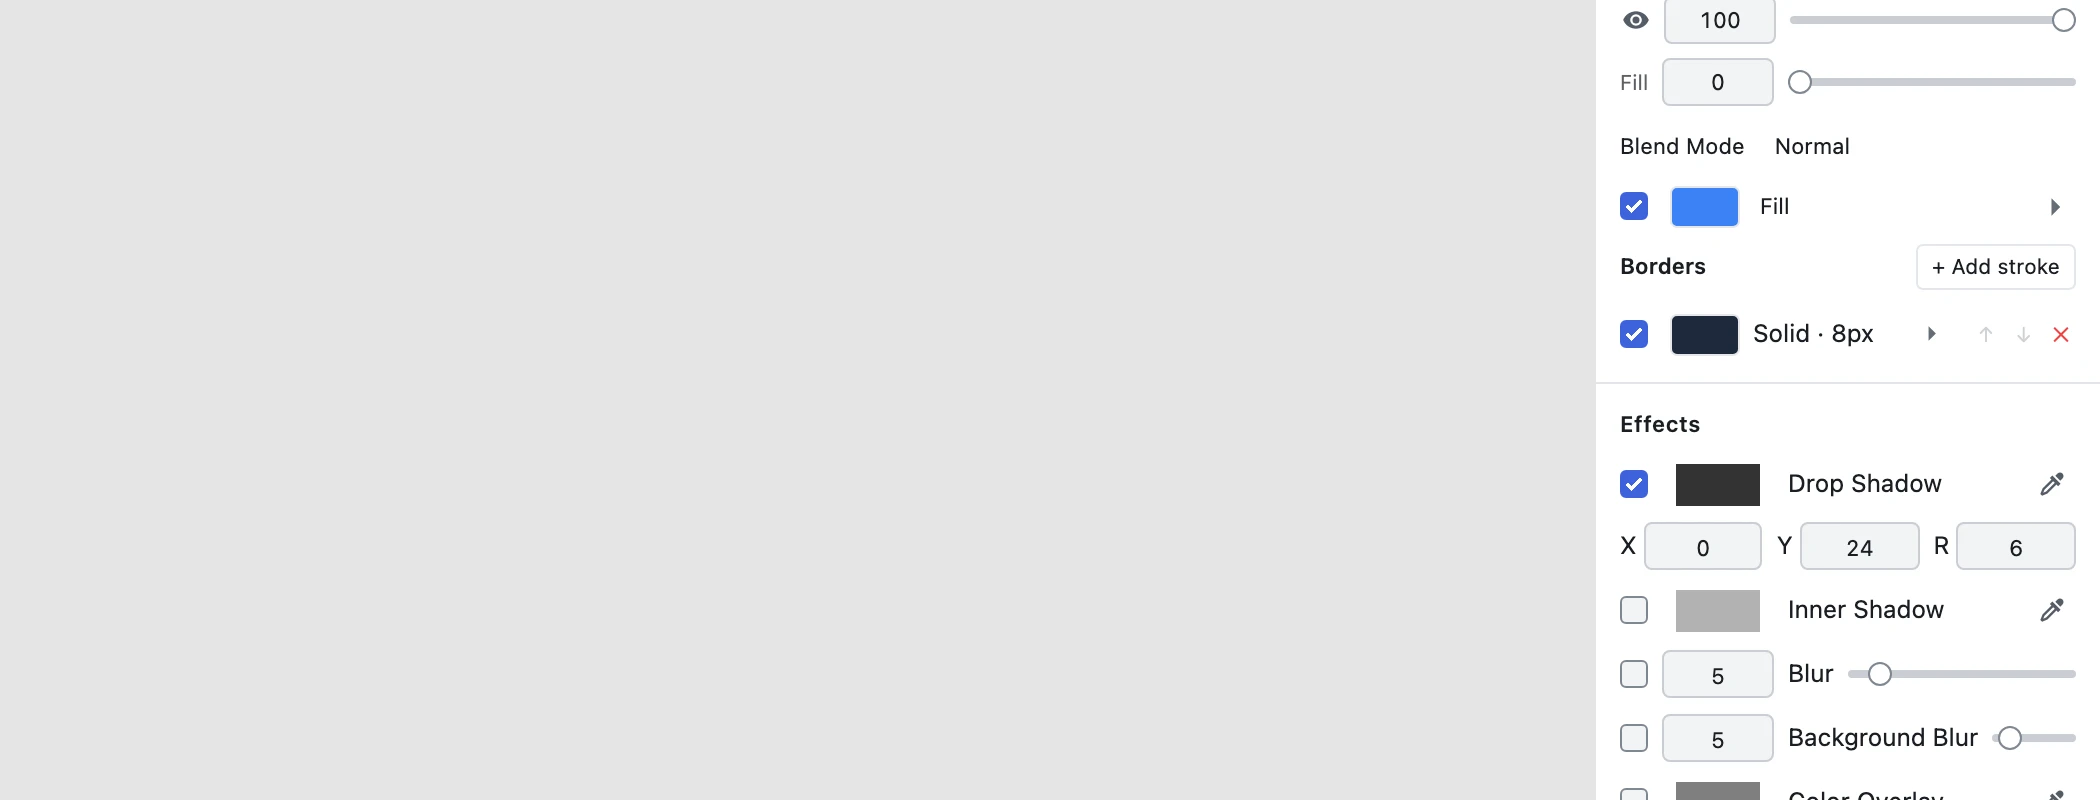
Try it yourself:
- Draw a rectangle with a solid fill, then give it a stroke and a drop shadow.
- Select the rectangle and drag the Fill slider to 0% (or type 0).
- Watch the fill vanish while your stroke and shadow stay at full strength.

You can script the same change:
await figpea.layer.stylePatch(layerId, { fillOpacity: 0 });
fillOpacity takes 0..1, and effects stay at opacity. See Agent API.
Fill never fades effects — to fade everything including shadow, lower Opacity, not Fill.
Components & Instances
Figpea uses a component master and linked instance model for reusable design elements — the same model Adobe XD symbols and Figma components map onto when you open those files. If you know Photoshop's Smart Objects, this is Figpea's equivalent: instead of embedding an editable copy inside a layer, you convert a layer into a component master and place linked instances of it. Opened PSD smart objects stay as placed content — Smart objects — and do not become editable masters on import.
Working with Component Masters & Instances
- Create component masters: Convert any layer or group into a reusable component master so you can place linked copies across your project.
- Place linked instances: Insert instances that maintain a live link to the master component, automatically inheriting visual updates from the master.
- Edit master content: Editing visual elements, vector paths, or fills inside a component master updates every linked instance on the canvas simultaneously.
- Manage instance overrides: Customize individual properties on an instance — such as text content, fills, or visibility — while keeping the instance connected to its master component for other properties.
- Remove and restore instance children: Delete a child layer inside an instance and Figpea tracks it as removed rather than destroying it — restore it from the instance's Removed layers list whenever you want it back, independent of the master and every sibling instance.
Component & Instance Benefits
- Non-destructive updates: Modify the master design in one central place without manually editing every copy across your pages.
- Consistent styling: Ensure buttons, icons, and repeated UI elements stay synchronized across complex multi-screen layouts.
- Independent transforms: Position, scale, or rotate instances individually without altering the master component's placement or dimensions.
- Imported component fidelity: Adobe XD symbols and Figma components import as component masters and instances too, so files built with those tools keep the same live-update behavior in Figpea.
For an in-depth guide on master components, instance overrides, and geometry sync, see Components and Instances.
Performance Techniques
Large File Management
- Use layer compression
- Optimize preview quality
- Manage layer visibility
- Group complex structures
Memory Optimization
- Rasterize when needed
- Use linked resources
- Clean up unused effects
- Optimize layer count
Tips for Advanced Usage
-
Workflow Optimization:
- Use keyboard shortcuts extensively
- Create custom workspaces
- Set up common presets
- Maintain organized libraries
-
Quality Control:
- Use the inspect tool regularly
- Verify measurements
- Check color accuracy
- Maintain consistent styling
-
Complex Operations:
- Plan layer structure
- Use non-destructive editing
- Maintain backup states
- Document special effects
-
Professional Practices:
- Follow naming conventions
- Keep organized layer structure
- Document complex setups
- Use consistent techniques
For more detailed information about specific advanced operations, check our blog posts or move on to learning about Transitions.